

Building your first workflow
1
Open Workflows
Go to imagine.art/flow and create a new workflow, or open an existing one from your dashboard.
2
Add your first node
Click Nodes in the left sidebar to open the node library. You can also right-click or double-click anywhere on the canvas to open it in place.Browse by category or search for a node by name, then click it to place it on the canvas.
3
Configure the node
Click the node to select it. The right sidebar displays the node’s settings and the available AI models for that node type. Set your model, parameters (resolution, aspect ratio, seed, etc.), and any required inputs.
4
Add and connect more nodes
Add additional nodes as needed for your pipeline. To connect two nodes, click and drag from an output handle (right side of a node) to a compatible input handle (left side of another node), then release to form the connection.Connections are type-safe: image handles connect only to image handles, text to text, and video to video.
5
Run the workflow
Click the Run button inside a node, or select nodes and click Run Selected in the right sidebar. You can also press
Ctrl/Cmd + Enter to run the selected nodes. The workflow processes each node in sequence, so you can run just part of your pipeline.6
Iterate and refine
Review the output, adjust prompts or settings, and re-run. Workflows are designed for iteration—tweak any node and re-run without rebuilding from scratch.
Canvas navigation
Panning- Hold
Spaceand drag. - Scroll the mouse wheel, drag with the middle mouse button, or use a two-finger drag on a trackpad.
- Hold
Ctrl/Cmdand scroll, or use a pinch gesture on a trackpad. - Click the zoom percentage in the bottom-left corner of the canvas for zoom options, including Zoom to fit.
- You can zoom out as far as 1% and in as far as 200%. The dotted grid stays visible at every zoom level.
Adding and managing nodes
Connecting and removing handles
To connect a handle: Drag from an output slot on the right side of a node to a compatible input slot on the left side of another node. Release to form the connection. To remove a handle: Hover over the connection handle—an × button appears. Click it to disconnect, or select the connection and pressDelete or Backspace.
Left sidebar and bottom toolbar
The sidebar on the left side of the canvas gives you access to Content, Nodes, Search, Assets, and Presets. The toolbar at the bottom of the canvas holds your editing tools:Right sidebar
When you select a node (or multiple nodes), the right sidebar shows settings specific to that selection:- Node properties and model settings — Configure parameters for the selected node.
- Model selection — Choose from available AI models. Settings like aspect ratio, resolution, and other parameters update dynamically based on the model you select.
- Number of runs — Specify how many times the selected node(s) should execute per run.
- Run Selected — Execute only the selected nodes with their current settings.
Version History
Workflows save your canvas automatically as you work. Version History lets you browse past states of your canvas and roll back to an earlier one, so you can experiment freely without worrying about losing work. The panel groups versions into two lists:- Auto Saved Versions: the most recent automatic saves.
- Saved Versions: versions you saved yourself. Click the cloud icon (Save Workflow) next to the workflow name to save one.
1
Open the Version History panel
Click the menu icon in the top-left corner of the editor, then select Version History.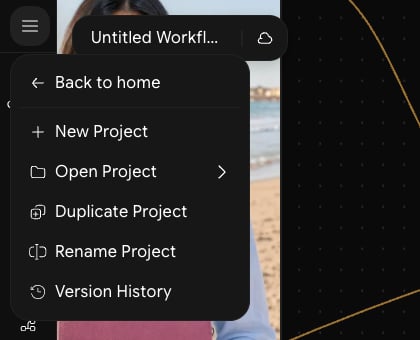
2
Preview a version
The Version History panel opens on the right. Each entry shows when it was saved and who saved it. Click an entry to preview that version on the canvas. A Currently viewing label at the bottom of the canvas shows which version you’re looking at, and the editing tools are disabled while you preview.To go back to your latest canvas, click current version at the top of the panel.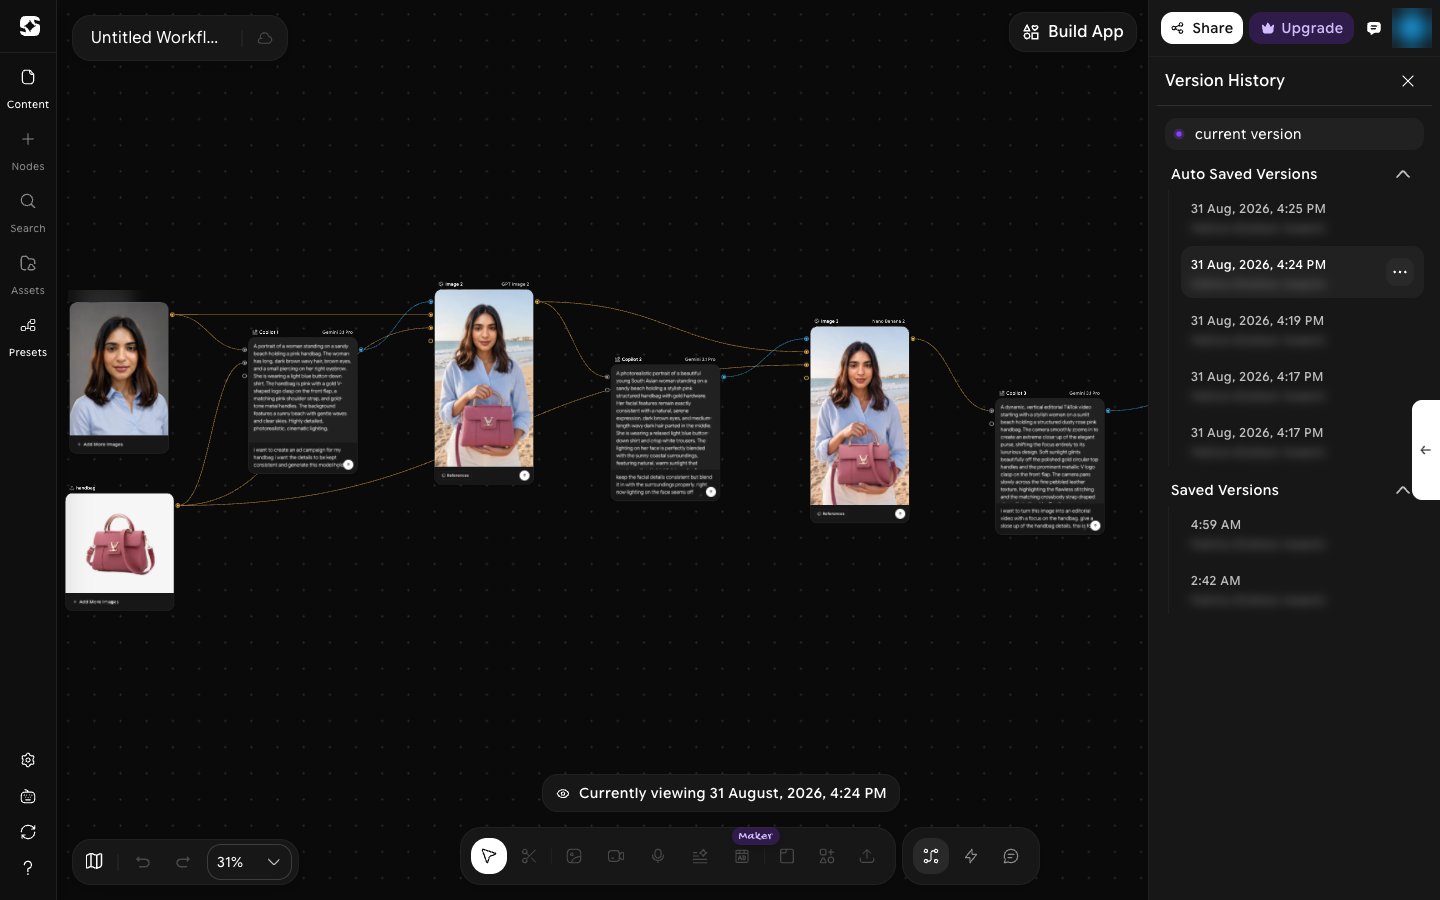
3
Restore or manage a version
Click ⋯ next to an entry to open its menu: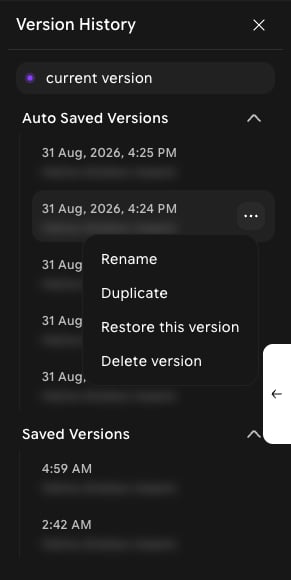
- Rename: give the version a name.
- Duplicate: make a copy of the version.
- Restore this version: roll the canvas back to this version.
- Delete version: remove the version from the history.
Draw on Canvas
You can sketch, annotate, and ideate directly on the workflow canvas without leaving the platform. Drawing is free-form — use it to mark up connections, diagram ideas, or leave visual notes for collaborators. To start drawing:1
Open the Draw tab
Click Sticky notes, shapes, and more in the bottom toolbar to open the Collab panel, then select the Draw tab. Choose the pen, set the stroke size with the slider, and pick a color.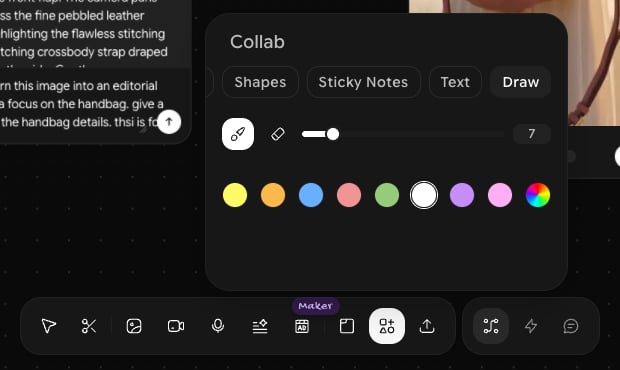
2
Draw on the canvas
Click and drag anywhere on the canvas to draw freely.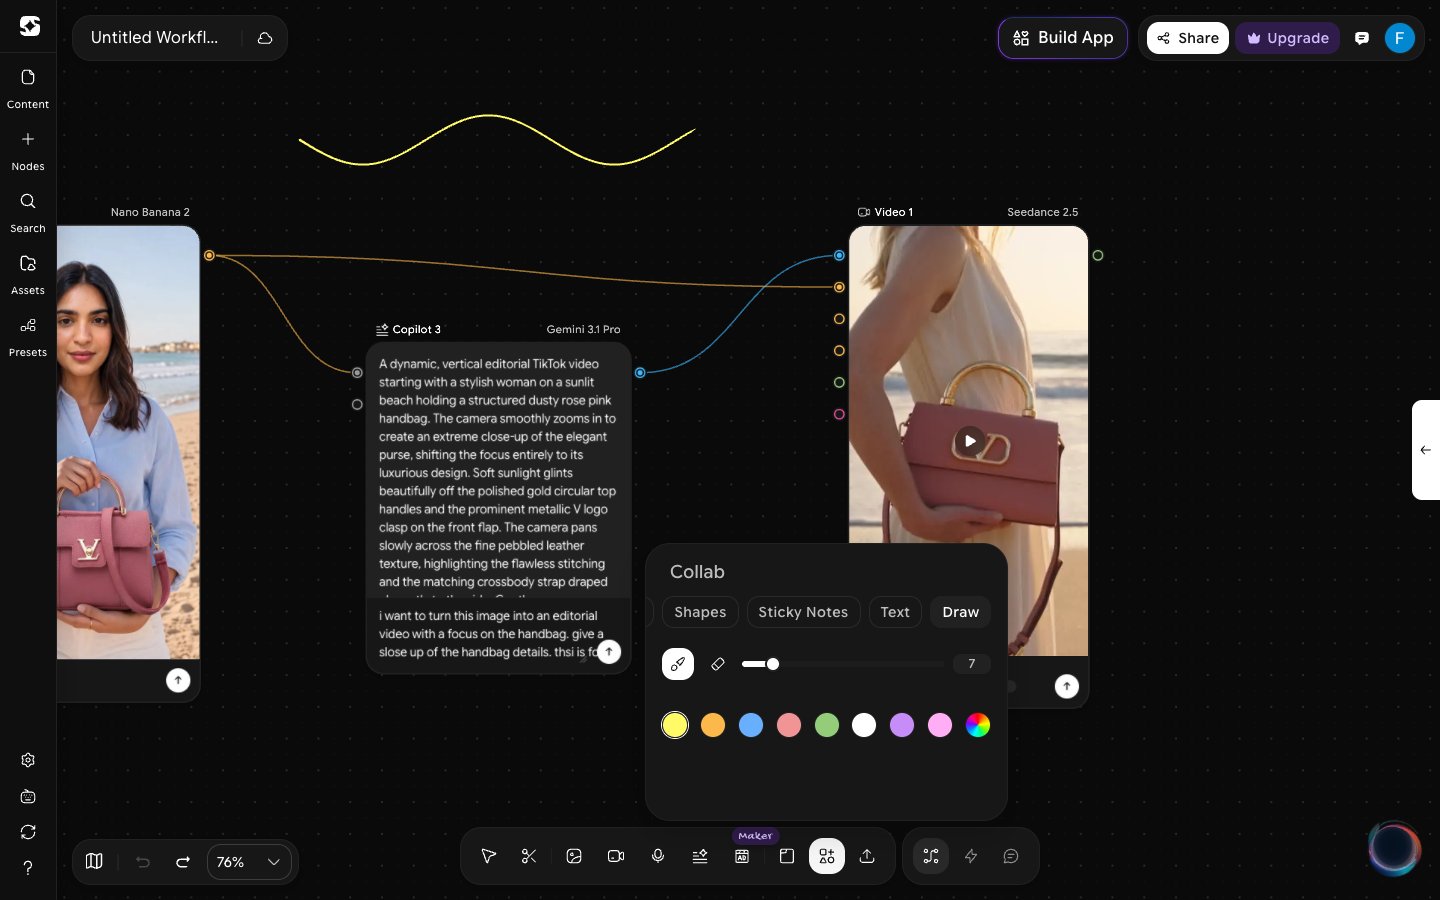
3
Erase strokes
Select the eraser icon in the Draw tab and drag over the strokes you want to remove.
Organizing your workspace
Use Section (from the bottom toolbar) to group related nodes into labeled containers. This keeps large workflows readable and makes it easy to identify different stages of a pipeline—for example, separating a “Generation” section from a “Post-processing” section. You can also use Sticky notes, shapes, and more (stickers, shapes, sticky notes, text, and drawings) to annotate your canvas with explanations or design decisions, which is useful when sharing workflows with teammates.Keyboard shortcuts
See Keyboard Shortcuts for the full list.