

https://www.imagine.art/mcp. Pick your client at the top of the page. The MCP tab shows chat and IDE clients; the CLI tab shows terminal clients. Each client has a Connect In button and a How To Connect? guide.
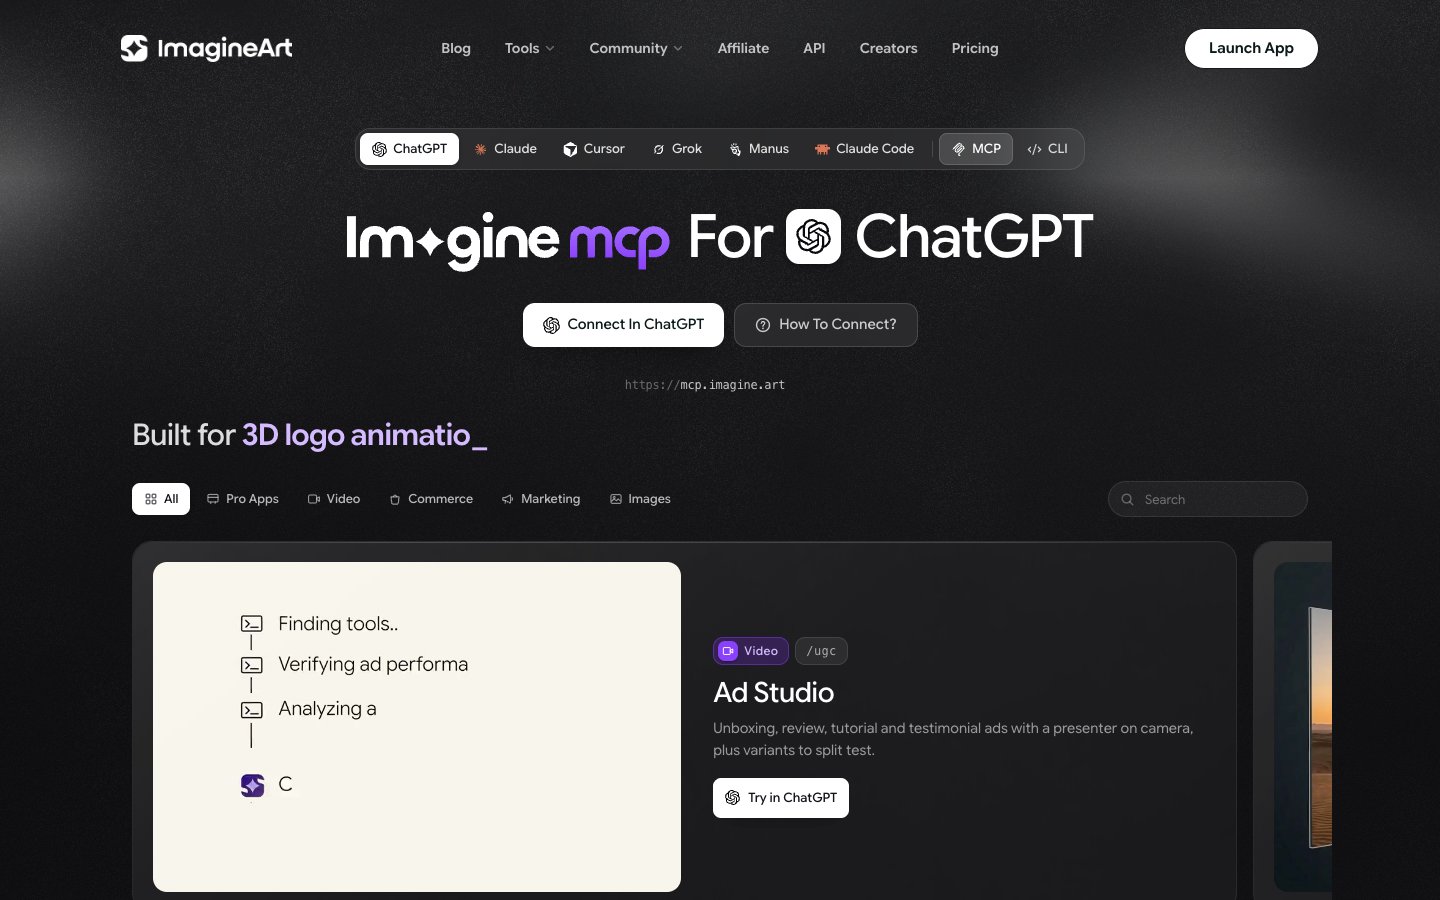
Add the server
https://mcp.imagine.art.Sign in
Create something
What is MCP?
MCP (Model Context Protocol) is an open standard that lets an AI agent connect to external tools. ImagineArt runs a hosted MCP server; your AI client (Claude, Cursor, and so on) acts as the host that connects to it. When you register the ImagineArt server, its creative tools appear as native tools your agent can call. The connection is:- Hosted — the server lives at
https://mcp.imagine.art. There’s nothing to run or install. - Authenticated by your account — you sign in with your imagine.art login over OAuth. Your agent opens a browser once to sign in, and the credentials stay on your own machine. There is no API key to generate, store, or rotate.
- Billed through your credits — no separate MCP pricing. The free tier includes 100 credits/day.
Why Imagine MCP
Most creative MCP servers require API keys, separate billing, and credential management across platforms. Imagine MCP skips all of that.- No API key needed — every request authenticates through your imagine.art account.
- Every tool in one connection — image, video, music, upscaling, background removal, fashion, and ad generation are all reachable through a single server, so you can chain them in one conversation.
- Uses your current balance — runs on the same credit system as the platform; your existing plan and balance carry over with no extra charges.
- Your work lands in your workspace — everything you generate through your agent is saved to your ImagineArt workspace, so you can find, reuse, or delete it later. See Security and privacy.
What you can build
Tell your agent what you’re working on and it picks the right tools, chains them together, and delivers production-ready results without you leaving the conversation. Generate an image, upscale it, strip its background, then feed it into a video tool. Shoot a model in an outfit, then animate the still into a campaign clip. Turn a product photo into a finished ad — all in one agent session.Use-case gallery
The Built for section of the MCP page is a gallery of ready-made use cases. Filter it by All, Pro Apps, Video, Commerce, Marketing, or Images, or search it. Each card has a Try in ChatGPT button that opens ChatGPT with the prompt filled in, and a Copy prompt button so you can paste the prompt into any other client.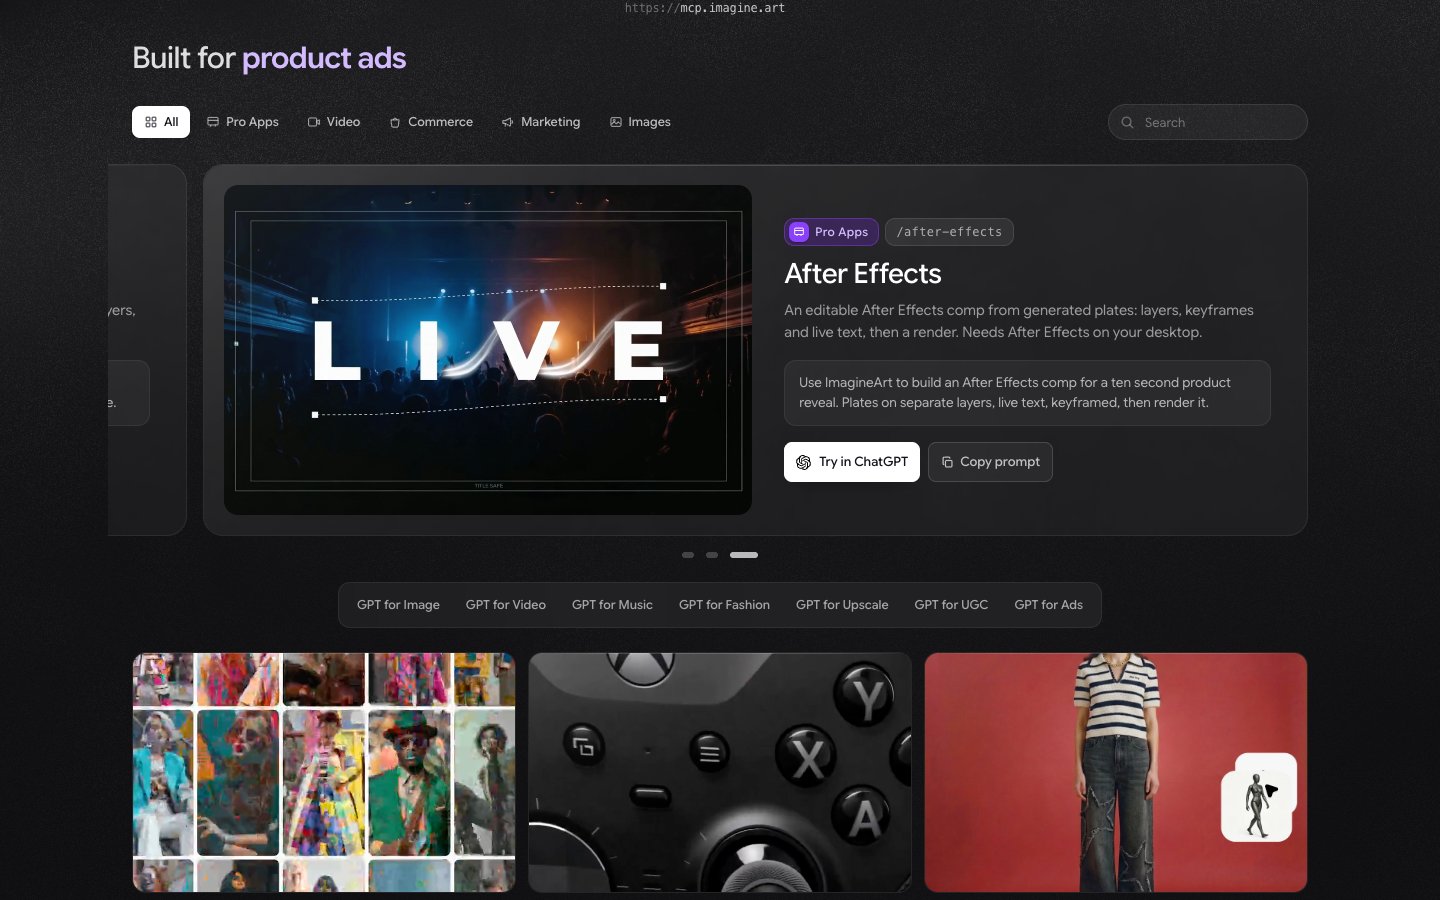
Use ImagineArt to build a marketplace listing set for a stainless steel tumbler: white background hero, three lifestyle scenes and a cutout PNG.Below the gallery, the GPT for Image, GPT for Video, GPT for Music, GPT for Fashion, GPT for Upscale, GPT for UGC, and GPT for Ads links open pages about using ImagineArt for each job inside ChatGPT.
Supported models
One connection gives your agent access to ImagineArt’s image, video, audio, and avatar models. The MCP page lists PixVerse, Veo, Kling 3, Seedance, Runway, Hailuo, Wan, Luma, Seedream, Flux, Nano Banana Pro, and Midjourney. Each tool has a default model; ask your agent for a specific one if you want it.Available tools
Imagine MCP has 96 tools, all native MCP tools your agent can call directly in the conversation. Seven cover most of what people ask for. The rest are tuned to specific jobs, plus tools that manage the products, avatars, models, and wardrobes those jobs draw on.Seven core tools
Guided studio workflows
Beyond the core tools, two full multi-step workflows are available — each walks your agent through a short setup, then generates a polished, production-ready result:- Fashion Studio — compose a model, wardrobe, scene, and pose into a finished photoshoot, or animate a still into a campaign video. See Fashion Studio below.
- Ad Studio — turn a product and an avatar into a finished ad, image or video, using a format, hook, and setting. See Ad Studio below.
Specialized creative tools
Purpose-built recipes that combine the core engines into polished, ready-to-use outputs:- Logo generation — clean, scalable brand marks
- 3D logo animation — turn a flat logo into a cinematic reveal
- Cinematic product ad — animate a product photo into a commercial clip
- Giant product showcase — surreal building-scale product hero shot
- UGC lifestyle try-on — authentic influencer-style product photos
- Instagram post — scroll-stopping hero image with caption and hashtags
- YouTube thumbnail — high-CTR 16:9 thumbnail with overlay guidance
- Interior design — redesign a room from a photo or a concept
- Jewelry video — luxury macro product commercial
- Cooking video — turn a person’s photo into a tutorial clip
- Drone/aerial video — sweeping flyover, orbit, and top-down shots
Workflow and account helpers
- Upload images — bring your own reference assets into a generation
- List generations/uploaded assets — browse what you’ve made
- Select organization and folder — choose the workspace and where outputs are saved
Fashion Studio
Fashion Studio is a guided, multi-step workflow for AI fashion photoshoots and fashion videos — model, wardrobe, scene, and pose composed into finished editorial or catalogue shots, or animated into short campaign clips.Ask for a shoot
Walk through setup
Review the results
How it works
Fashion Studio shares one setup, then splits into two branches:- Shared setup: organization → shoot type (editorial or catalogue) → project
- Photoshoot branch: model → wardrobe (outfit + footwear/accessories, optional) → background (optional) → pose (optional) → generate
- Video branch: pick a finished still → template or free-text motion → camera movement (optional) → duration/aspect/resolution → generate
Example workflow
Create an editorial lookbook shot: put the navy blazer and the white sneakers on my “Studio Model 1,” in a soft daylight loft setting, 4:3.The agent walks org → shoot type → project (reusing your existing project if you have one), then model, wardrobe, and background selection, then generates the shoot and shows the results. Ask it to “turn that into a 6-second campaign clip” afterward and it animates the still using a matching video template.
Ad Studio
Ad Studio turns a product photo (or an existing product) into a finished ad — image or video — by chaining together a product, an avatar, a format, and an optional hook and setting.Ask for an ad
Pick a product and avatar
Confirm and generate
The pipeline
Ads are generated through a sequential setup: organization → marketing project → product → avatar → format → hook → setting → generate.Example workflow
Create a testimonial-style ad for my ceramic mug using my “Sarah” avatar, 9:16, 1080p, 10 seconds.The agent resolves the mug as your product and Sarah as your avatar, matches “testimonial” to its format, confirms the hook/setting, then generates the ad at the specs you gave.
Passing parameters and references
You control each generation through a few simple parameters. You don’t pass these as raw code — just describe them to your agent (for example, “make it 16:9, 4K, using the veo model”) and it maps them to the right tool.Common parameters
Using references
- By URL — pass the URL of an existing image as a reference.
- By upload — upload your own image(s) directly and use them as references.
- Multiple references — for video, you can supply more than one reference image (and on some models, reference video or audio) to guide the result.
Example workflows
Each example is just what you’d type to your agent. A single imageGenerate an image of a red bicycle at sunset, 16:9, 4K.The agent calls text-to-image and returns the finished image in the conversation. Chain tools into a product hero shot
Generate a sleek matte-black water bottle on a marble surface, then upscale it and remove the background.Image → upscale → background removal, all in one session, ending with a transparent PNG ready to drop into a design. Turn your own photo into an ad
Here’s my product photo — turn it into a 6-second cinematic ad with a luxury mood.Upload the reference, then the cinematic product-ad tool animates it into a commercial clip. Build a mini brand kit
Create a minimal wordmark logo for “Northwind Coffee”, then animate it into a 3D reveal.Logo generation → 3D logo animation, producing both a static mark and a motion intro. Shoot and animate a fashion look
Put this jacket on a model for an editorial shoot, then turn the best still into a 6-second campaign clip.Fashion Studio composes the shoot, then animates the chosen still using a matching video template. Build a UGC-style ad from a product photo
Here’s my product — create a UGC-style ad with an avatar, 9:16, 15 seconds.Ad Studio resolves the product and avatar, applies the UGC format, and generates the finished vertical ad.
How to connect
There are three ways to connect, depending on your client:- From a directory — in ChatGPT and Manus, ImagineArt is listed in the client’s own plugin or connector directory. Install it and sign in; there’s nothing to paste.
-
As a custom connector — in Claude and Grok, paste the server URL
https://mcp.imagine.artinto the client’s connector settings. -
With one command — the
@imagineartofficial/mcpnpm package includes an installer that writes the server into your client’s config for you:imagine installsets up eleven clients: Claude, Claude Code, Cursor, Codex, VS Code, Windsurf, Cline, Gemini CLI, Hermes, OpenClaw, and Grok. It opens your browser once so you can sign in.
Let your agent set it up
Each client on the MCP page has a Copy and send this to box with a ready-made setup prompt. Click Copy, paste it into your agent, and it installs and connects Imagine MCP for you. For example, the Claude Code prompt is:imagine install value swapped in: chatgpt, claude, claude-code, cursor, grok, manus, codex, hermes, openclaw, or cli for a plain terminal.
ChatGPT
ImagineArt is in the ChatGPT plugin directory, so there’s no URL to paste.Open ImagineArt in ChatGPT
Install the plugin
Start creating
@ImagineArt and ask for anything.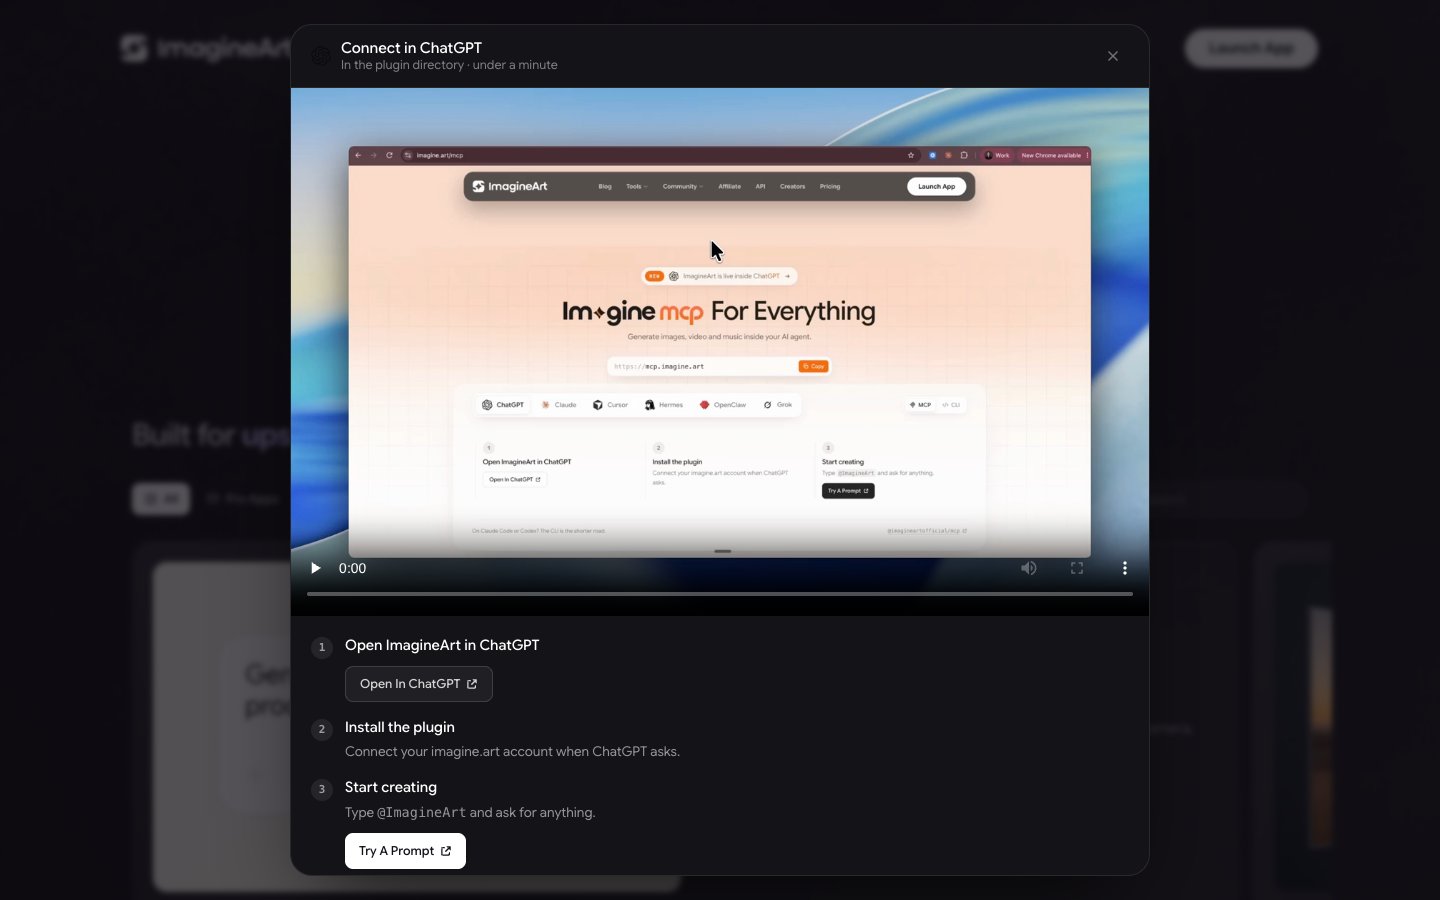
Claude
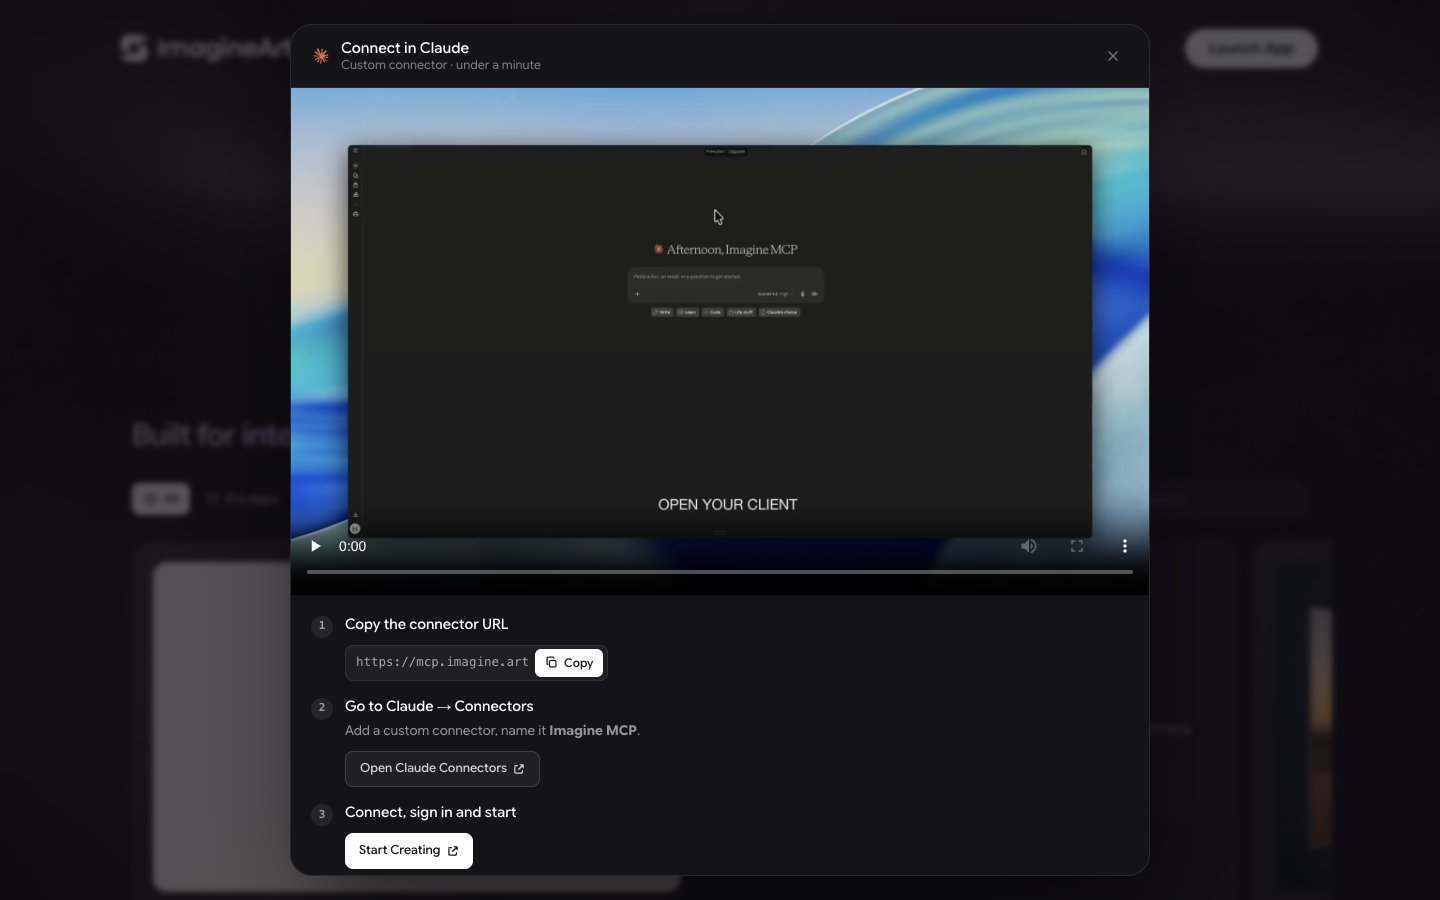
Copy the connector URL
https://mcp.imagine.artAdd a custom connector
Imagine MCP and paste the URL.Connect and create
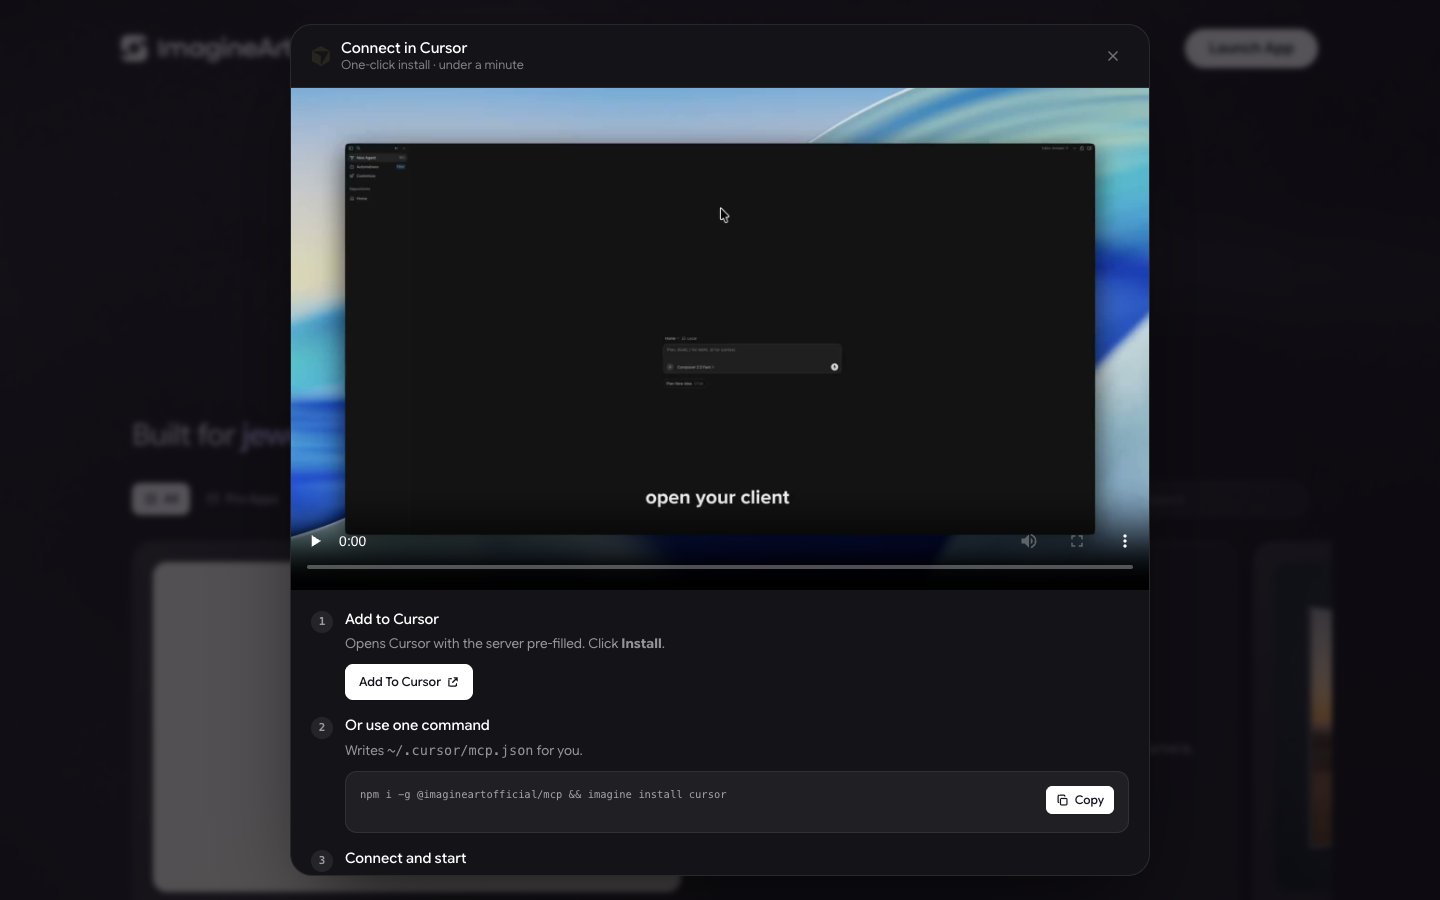
Cursor
Add to Cursor
Or use one command
~/.cursor/mcp.json for you:Connect and create
Manual configuration
Manual configuration
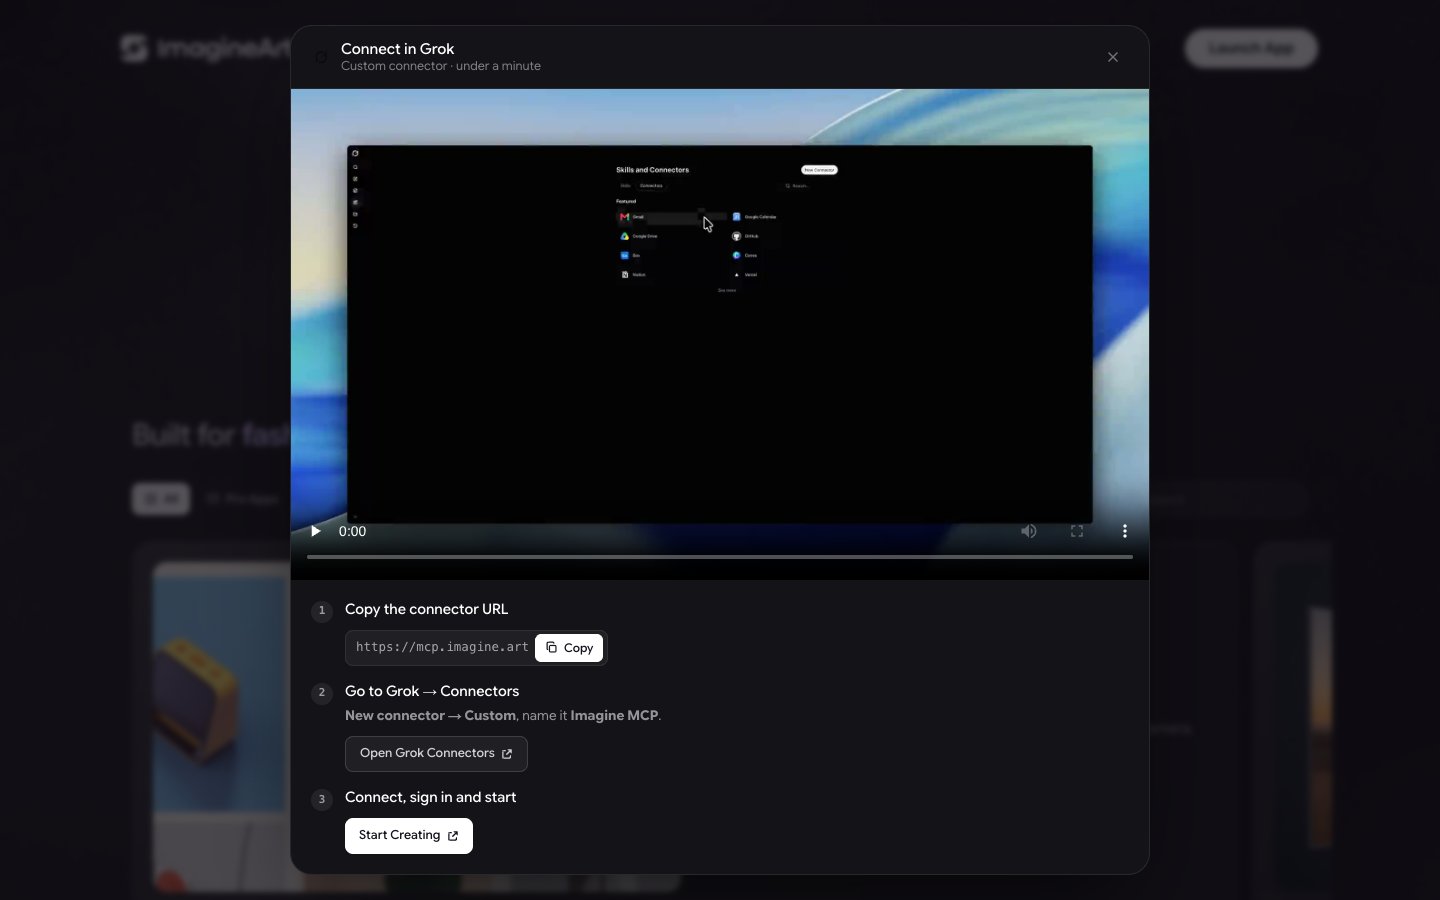
~/.cursor/mcp.json directly, and add:Grok
Copy the connector URL
https://mcp.imagine.artAdd a custom connector
Imagine MCP, then paste the URL.Connect and create
Manus
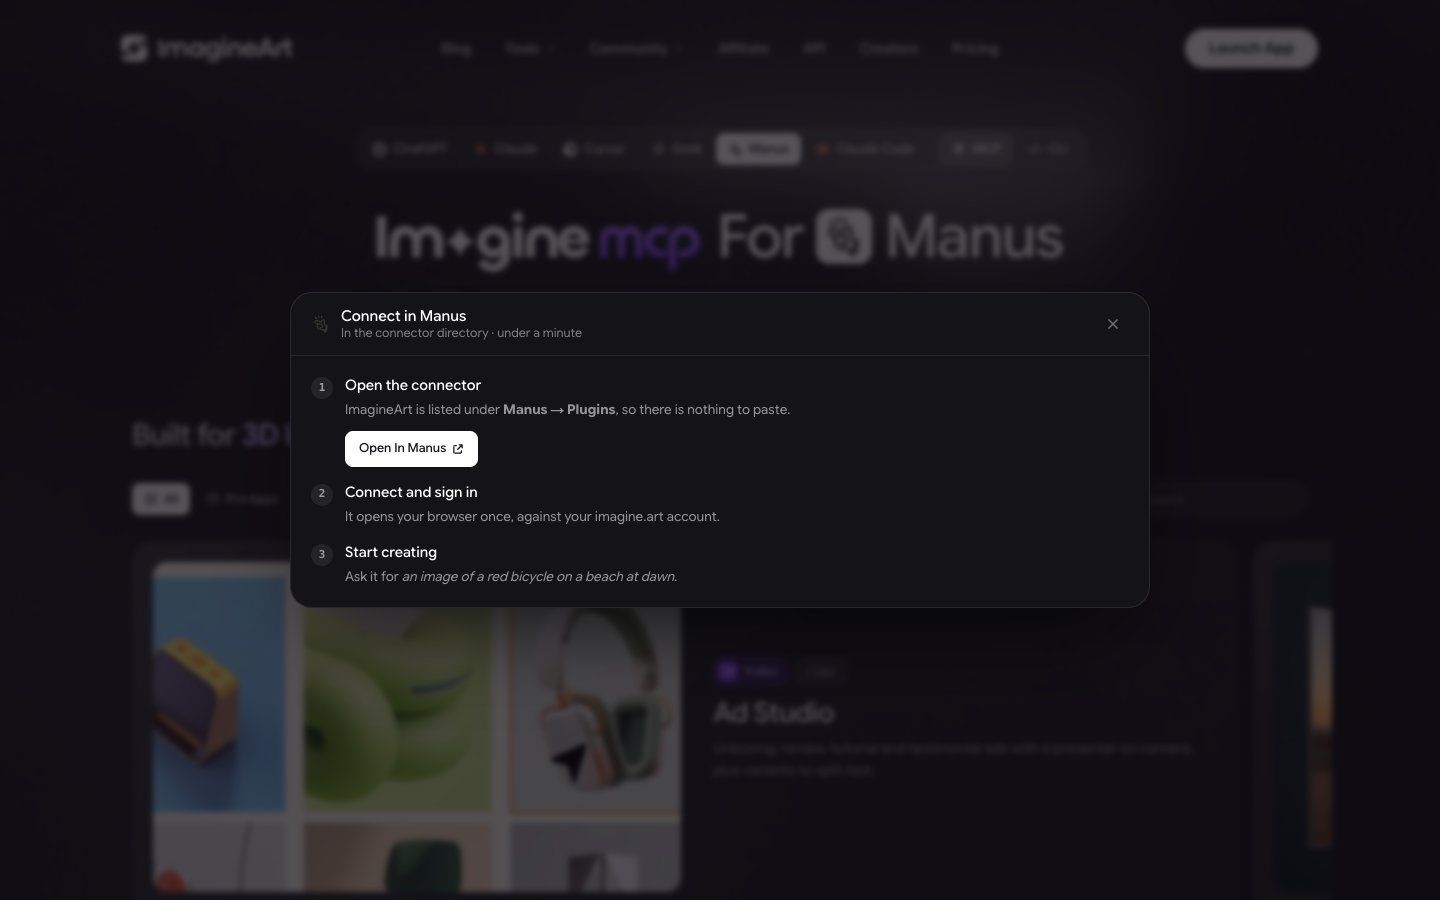
ImagineArt is an official connector in Manus. It’s listed under Manus → Plugins, so there’s nothing to paste.Open the connector
Connect and sign in
Start creating
Claude Code
Claude Code connects with the installer. In your terminal, run:Codex
Codex connects with the installer. In your terminal, run:VS Code, Windsurf, Cline, and Gemini CLI
These clients don’t have their own tab on the MCP page, but the installer supports them. Runnpm i -g @imagineartofficial/mcp, then imagine install followed by your client’s name. Any other client that speaks MCP can connect by adding https://mcp.imagine.art as a server in its settings.
OpenClaw
The fastest way to connect OpenClaw is the installer:openclaw update), and running. Then:
login prints an https://imagine.art/mcp/authorize?... URL. Open it, approve access, then copy only the value between code= and & from the redirect (the “site can’t be reached” page is normal). Wrap the code in single quotes so a stray & can’t break the command. Codes expire in about 1–2 minutes — re-run login for a fresh one if needed.OpenClaw command reference
OpenClaw command reference
status shows authorized and tokens=yes. A probe should report the full tool list.Hermes
The fastest way to connect Hermes is the installer:hermes and start generating. Hermes is listed on the CLI tab of the MCP page.
Manual setup with Hermes commands
Manual setup with Hermes commands
Does this server require authentication? [Y/n]:, type Y and then paste your bearer token.When Hermes asks whether to enable all tools, type y.Then type hermes and start generating.Imagine CLI
The Imagine CLI lets you generate straight from your terminal. You name the tool yourself, and the file is saved to the folder you’re in — no agent in the loop. It’s scriptable, so you can use it in your own scripts and CI jobs. Imagine MCP and the Imagine CLI are the same tools reached two ways, and one npm package ships both. With Imagine MCP, you ask your agent in plain language and it picks the tool. With the CLI, you run a command likeimagine image or imagine video.
To open the CLI page, click the CLI tab on the MCP page. Its client picker lists Terminal, Codex, Claude Code, Hermes, and OpenClaw.
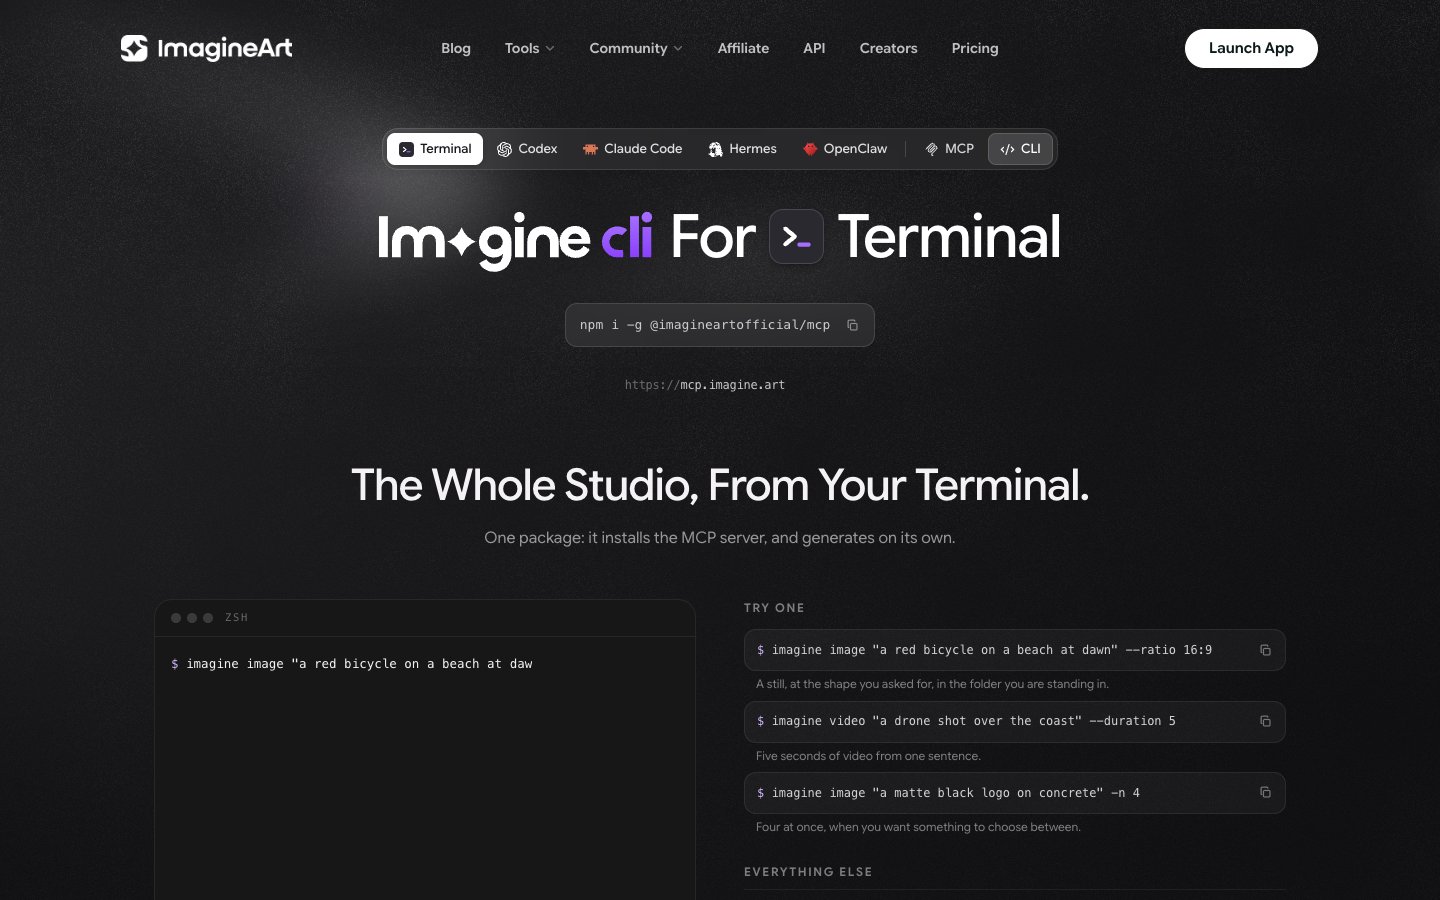
Install the package
Sign in
imagine install cli. It opens your browser so you can sign in with your imagine.art account.Generate
Example commands
Command reference
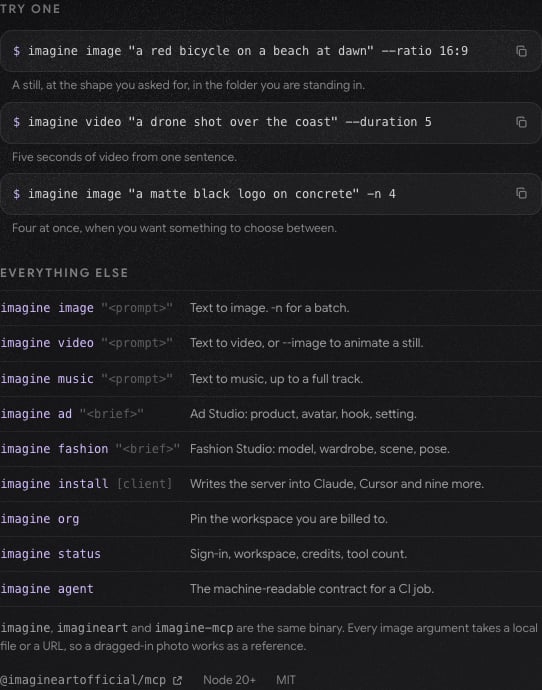
imagine, imagineart, and imagine-mcp are the same command. Every image argument takes a local file or a URL, so you can use a photo on your computer as a reference.
Security and privacy
- Your account is the only key — authentication runs through your existing imagine.art login. No shared API keys, no separate credentials to secure.
- Tokens stay local — your client stores the OAuth token on your machine and refreshes it automatically.
- Your creations stay in your workspace — content you generate through a connected agent is saved to your ImagineArt workspace and stays there until you delete it. ImagineArt doesn’t receive your conversation with the agent, only what the agent sends with each request, and doesn’t use your prompts, uploads, or generated content to train AI models. See Imagine MCP and connected AI assistants in the Privacy Policy.
- Trust only your own sign-in — never approve an authorization link or paste a code that came from anything other than your own client’s login command.
Troubleshooting
FAQ
How does Imagine MCP connect to AI agents?
How does Imagine MCP connect to AI agents?
Which agents are supported?
Which agents are supported?
imagine install command sets up eleven clients for you: Claude, Claude Code, Cursor, Codex, VS Code, Windsurf, Cline, Gemini CLI, Hermes, OpenClaw, and Grok.What is the difference between Imagine MCP and the Imagine CLI?
What is the difference between Imagine MCP and the Imagine CLI?
@imagineartofficial/mcp) ships both. Imagine MCP is the server your agent talks to, so you ask in plain language and the agent picks the tool. The Imagine CLI is for your terminal, where you name the tool yourself: imagine image, imagine video, imagine music, imagine ad, imagine fashion. Use the CLI when you want a file on disk in one line, scriptable and without an agent in the loop. See Imagine CLI.What tools are available?
What tools are available?
Do I need an API key?
Do I need an API key?
How does pricing work?
How does pricing work?
How long does generation take?
How long does generation take?
What can I create?
What can I create?
Does Imagine MCP support fashion shoots or ad generation?
Does Imagine MCP support fashion shoots or ad generation?