> ## Documentation Index
> Fetch the complete documentation index at: https://docs.imagine.art/llms.txt
> Use this file to discover all available pages before exploring further.
# Canvas Navigation
> Add, connect, and cut nodes, pan and zoom the canvas, and use the sidebars and toolbar in Workflows.
Learn how to navigate, add, and manage nodes on the canvas, connect handles, and use the toolbar and sidebar features.
## Adding and Managing Nodes
**Add a new node:**
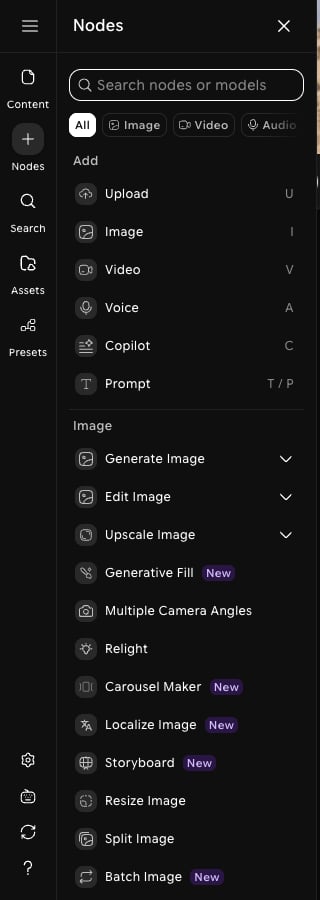
* Click **Nodes** in the left sidebar
 * Right-click or double-click anywhere on the canvas
* Search or browse by category
* Right-click or double-click anywhere on the canvas
* Search or browse by category
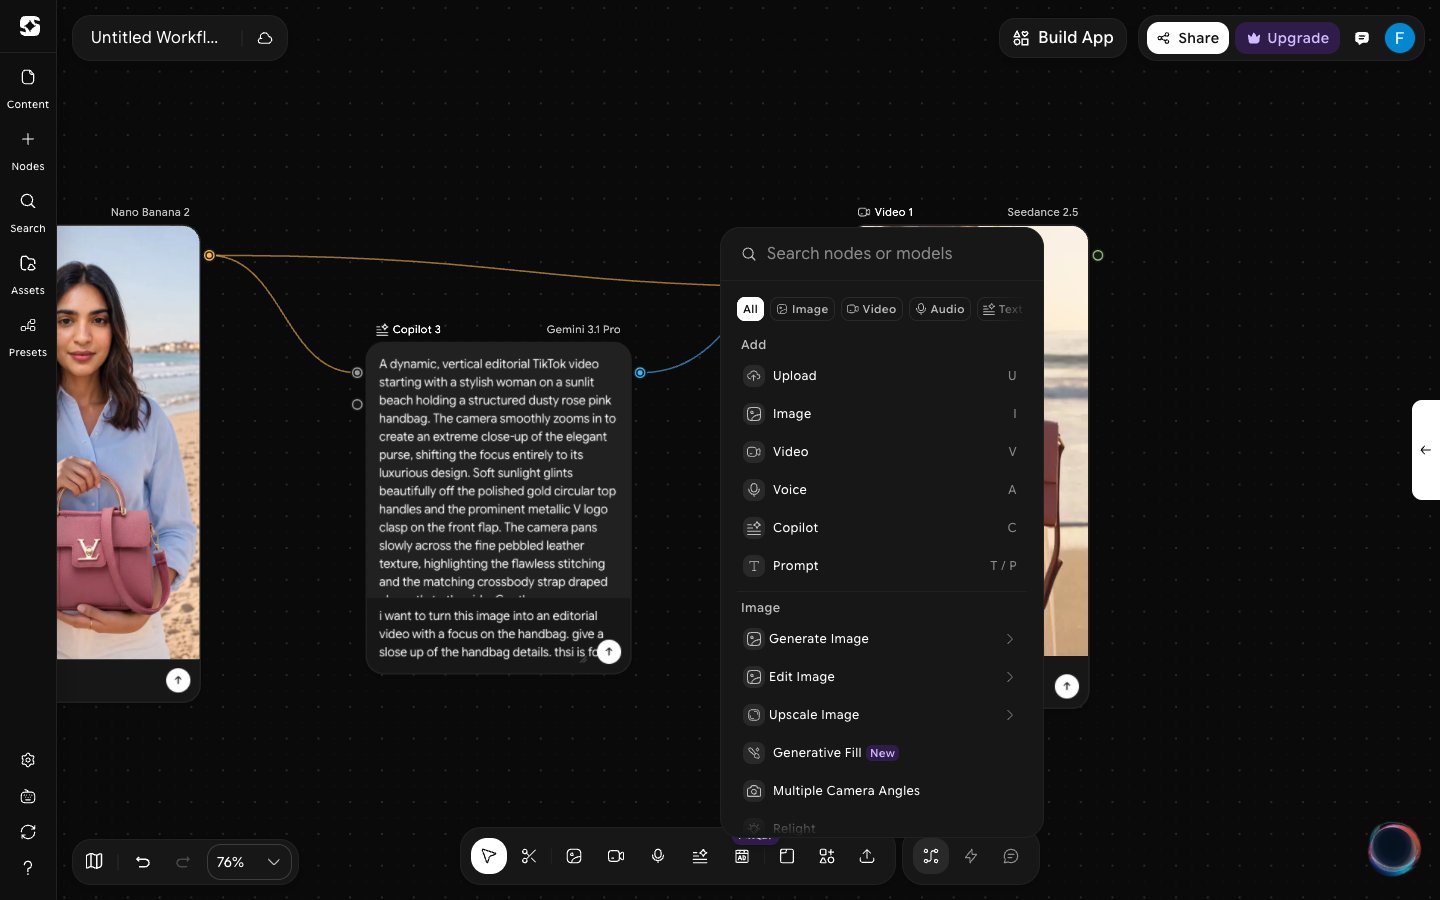 * Click to add the node
**Move a node:**
* Click and drag it to the desired location
**Remove a node:**
* Select it (Highlighted) and Press `Delete` or `Backspace`
**Duplicate a node:**
* Select it and Press `Ctrl/Cmd + D`
## Connect and Manage Handles
**Connect a Handle:**
* Click and drag from an output slot (right side of a node) and connect to a compatible input slot (left side of another node)
* Release to connect the handle
* Click to add the node
**Move a node:**
* Click and drag it to the desired location
**Remove a node:**
* Select it (Highlighted) and Press `Delete` or `Backspace`
**Duplicate a node:**
* Select it and Press `Ctrl/Cmd + D`
## Connect and Manage Handles
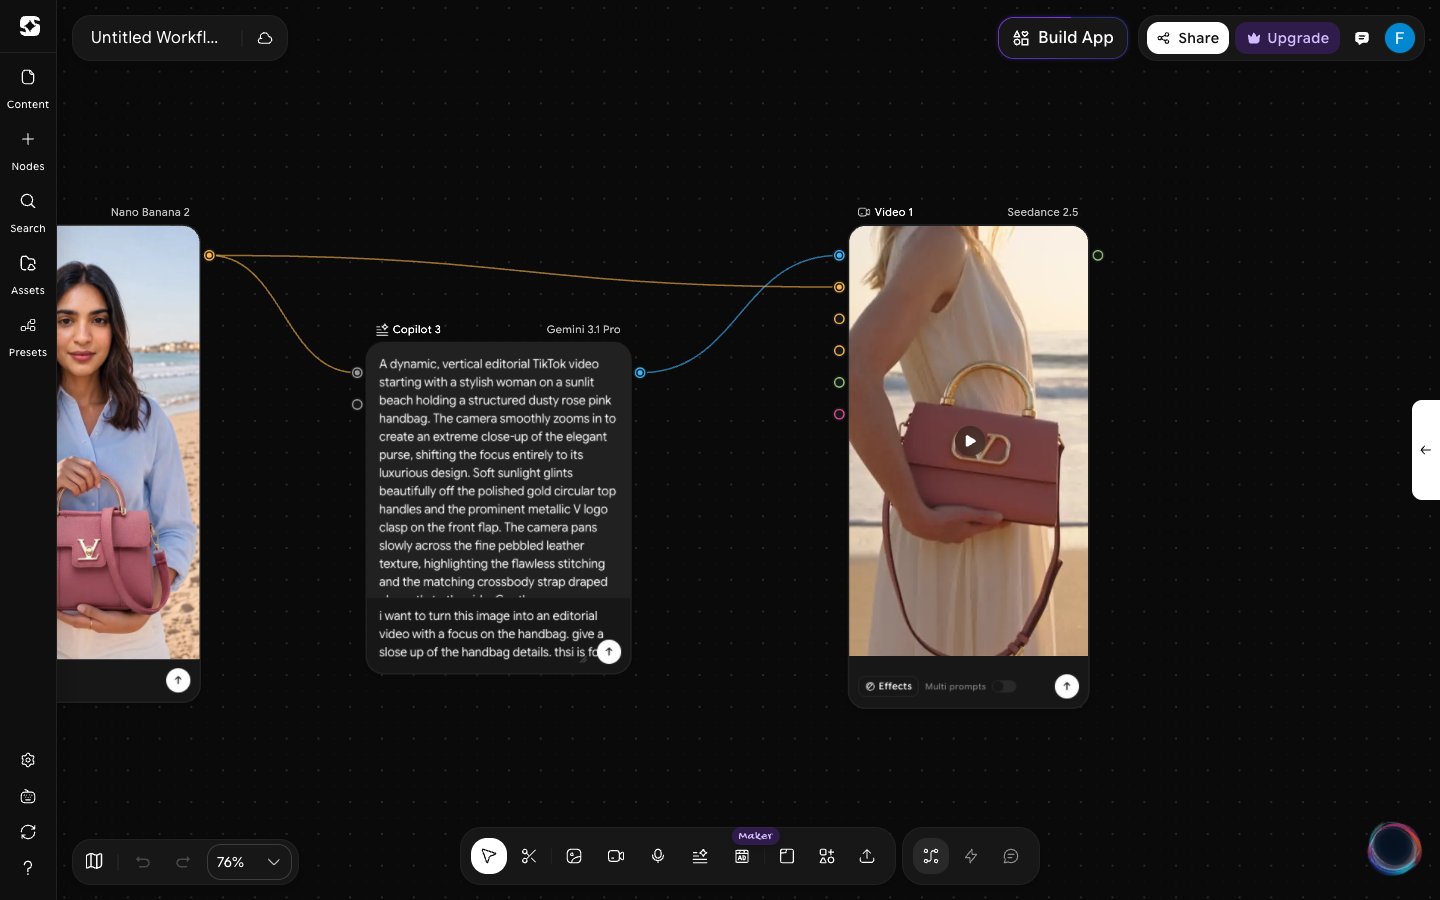
**Connect a Handle:**
* Click and drag from an output slot (right side of a node) and connect to a compatible input slot (left side of another node)
* Release to connect the handle
 **Remove a Handle:**
* On hovering the handle, a `"x"` button appears to remove/delete it
* Click to select it (Highlighted) and Press `Delete` or `Backspace`
## Cut Connections with Scissors
The **Remove edges** tool (scissors icon) lets you sever node connections by dragging across them — useful for quickly cleaning up complex graphs without having to click each handle individually.
**To use the Scissors tool:**
Click the scissors icon in the bottom toolbar, or press `K`. The icon opens a small menu where you can switch between **Remove edges** and **Connection** (`L`).
**Remove a Handle:**
* On hovering the handle, a `"x"` button appears to remove/delete it
* Click to select it (Highlighted) and Press `Delete` or `Backspace`
## Cut Connections with Scissors
The **Remove edges** tool (scissors icon) lets you sever node connections by dragging across them — useful for quickly cleaning up complex graphs without having to click each handle individually.
**To use the Scissors tool:**
Click the scissors icon in the bottom toolbar, or press `K`. The icon opens a small menu where you can switch between **Remove edges** and **Connection** (`L`).
 Drag across any connections you want to remove. Every connection you cross is severed. Press `S` to go back to the Select tool when you're done.
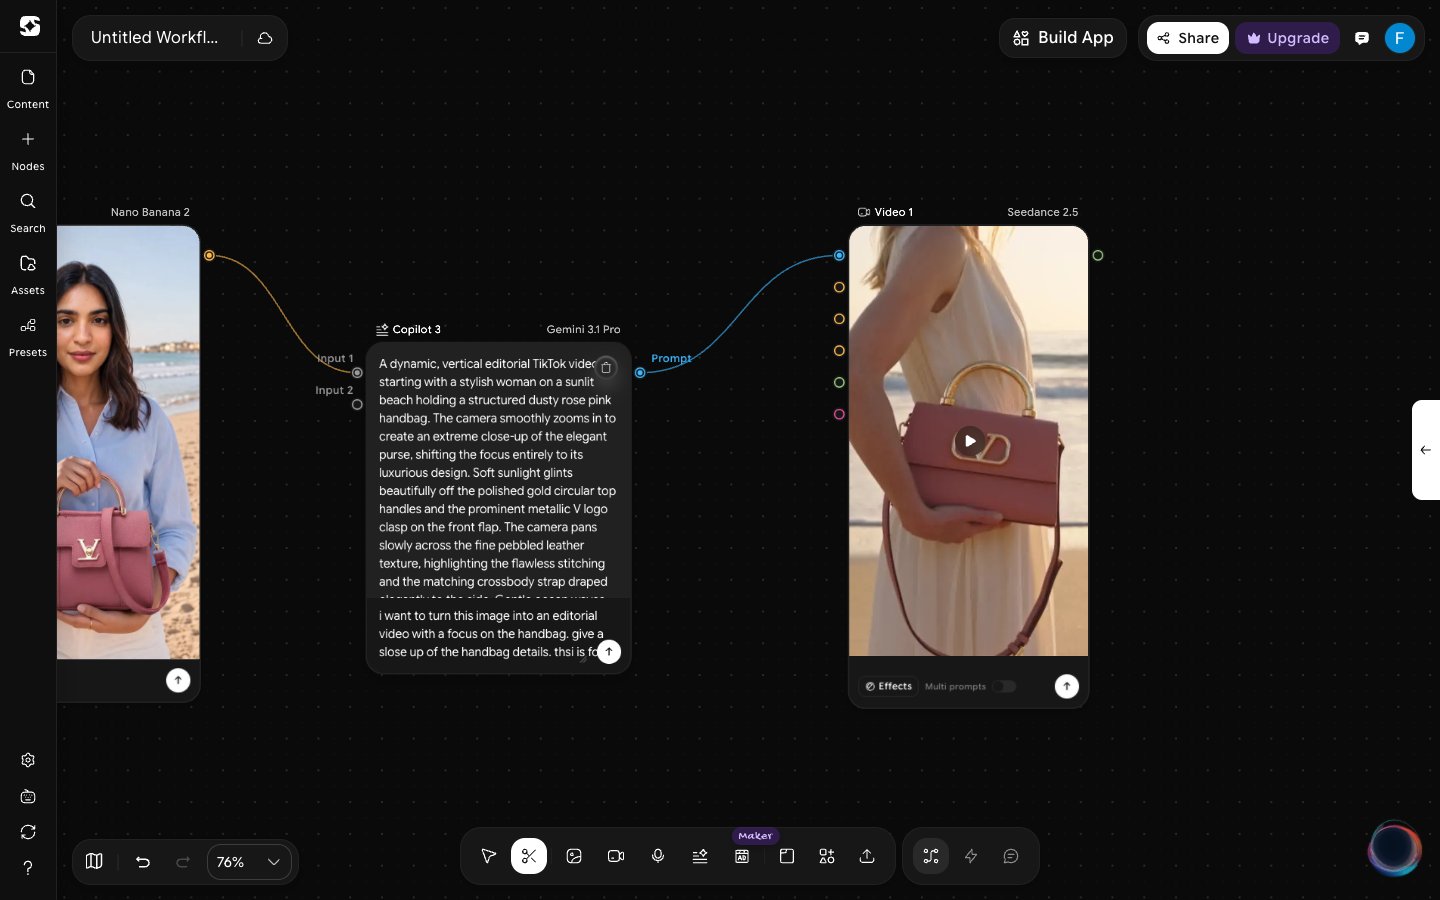 Use **Remove edges** when reorganizing a large workflow — it's much faster than deleting handles one by one.
## Canvas Navigation
**Pan the canvas:**
* Hold `Space` and drag
* Scroll with the mouse wheel, drag with the **middle mouse button**, or use a **two-finger drag** on a trackpad
With the Select tool, clicking and dragging on empty space draws a selection box instead of panning.
**Zoom:**
* Hold `Ctrl/Cmd` and scroll, or use the **pinch gesture** on a trackpad
* Press `Ctrl/Cmd + Plus` or `Ctrl/Cmd + Minus`
* Click the zoom percentage in the bottom-left corner to open the zoom menu: **Zoom in**, **Zoom out**, **Zoom to fit**, **Zoom to 50%**, **Zoom to 100%**, and **Zoom to 200%**
Use **Remove edges** when reorganizing a large workflow — it's much faster than deleting handles one by one.
## Canvas Navigation
**Pan the canvas:**
* Hold `Space` and drag
* Scroll with the mouse wheel, drag with the **middle mouse button**, or use a **two-finger drag** on a trackpad
With the Select tool, clicking and dragging on empty space draws a selection box instead of panning.
**Zoom:**
* Hold `Ctrl/Cmd` and scroll, or use the **pinch gesture** on a trackpad
* Press `Ctrl/Cmd + Plus` or `Ctrl/Cmd + Minus`
* Click the zoom percentage in the bottom-left corner to open the zoom menu: **Zoom in**, **Zoom out**, **Zoom to fit**, **Zoom to 50%**, **Zoom to 100%**, and **Zoom to 200%**
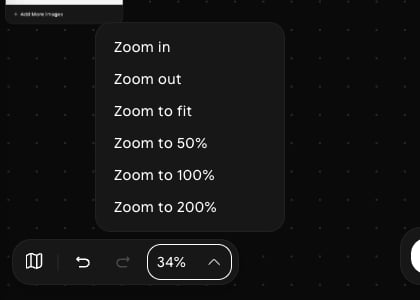 You can zoom from **1%** up to **200%**. Zooming out to 1% lets you see and move around very large canvases. The dotted grid stays visible at every zoom level, so you always keep your sense of position.
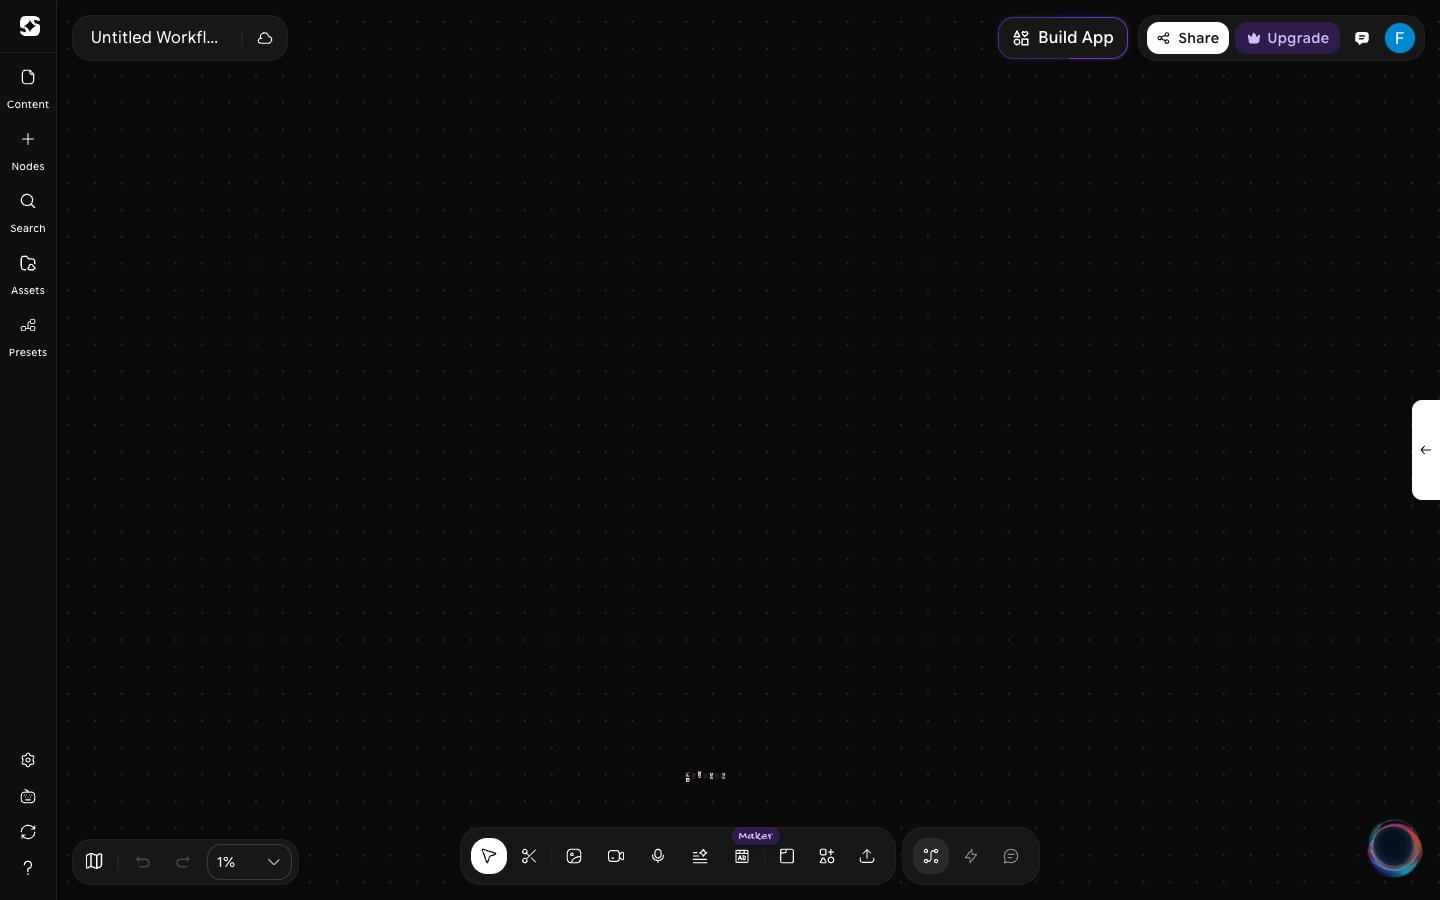 **Minimap:**
* Click the map icon next to the undo and redo buttons in the bottom-left corner to show or hide the **Minimap**
## Left Sidebar
| Button | Function |
| - | - |
| **Content** | Manage the workflow's **Pages** and saved **Variables** |
| **Nodes** | Browse or search every node, grouped by category such as Image, Video, Audio, and Text |
| **Search** | Search everything in Workflows, including projects, models, assets, and nodes (`Cmd/Ctrl + K`) |
| **Assets** | Access your **Uploaded Assets** and **My Creations**, or bring in media from Pinterest, Google Drive, Dropbox, Unsplash, and Pexels |
| **Presets** | Browse ready-made workflow presets by category, such as Marketing, Branding, and E-commerce and Product |
## Bottom Toolbar
| Button | Function |
| - | - |
| **Select** | Select and move nodes. Hold `Space` to pan the canvas |
| **Remove edges** / **Connection** | Cut connections, or switch to drawing connections |
| **Image**, **Video**, **Audio**, **Text** | Add a node of that type |
| **Ad Maker** | Add an Ad Maker node |
| **Section** | Add a section to group related nodes |
| **Sticky notes, shapes, and more** | Open the **Collab** panel with stickers, shapes, sticky notes, text, and drawing tools |
| **Upload file** | Upload media to the canvas |
The group on the right switches between **nodes**, **quick mode**, and **agent mode**. The controls on the left show the **Minimap**, undo and redo, and the zoom menu.
**Minimap:**
* Click the map icon next to the undo and redo buttons in the bottom-left corner to show or hide the **Minimap**
## Left Sidebar
| Button | Function |
| - | - |
| **Content** | Manage the workflow's **Pages** and saved **Variables** |
| **Nodes** | Browse or search every node, grouped by category such as Image, Video, Audio, and Text |
| **Search** | Search everything in Workflows, including projects, models, assets, and nodes (`Cmd/Ctrl + K`) |
| **Assets** | Access your **Uploaded Assets** and **My Creations**, or bring in media from Pinterest, Google Drive, Dropbox, Unsplash, and Pexels |
| **Presets** | Browse ready-made workflow presets by category, such as Marketing, Branding, and E-commerce and Product |
## Bottom Toolbar
| Button | Function |
| - | - |
| **Select** | Select and move nodes. Hold `Space` to pan the canvas |
| **Remove edges** / **Connection** | Cut connections, or switch to drawing connections |
| **Image**, **Video**, **Audio**, **Text** | Add a node of that type |
| **Ad Maker** | Add an Ad Maker node |
| **Section** | Add a section to group related nodes |
| **Sticky notes, shapes, and more** | Open the **Collab** panel with stickers, shapes, sticky notes, text, and drawing tools |
| **Upload file** | Upload media to the canvas |
The group on the right switches between **nodes**, **quick mode**, and **agent mode**. The controls on the left show the **Minimap**, undo and redo, and the zoom menu.
 ## Right Sidebar
**Nodes Properties and Model Settings:**
When you select a node or multiple nodes, the right panel displays settings specific to your selection and the chosen model.
## Right Sidebar
**Nodes Properties and Model Settings:**
When you select a node or multiple nodes, the right panel displays settings specific to your selection and the chosen model.
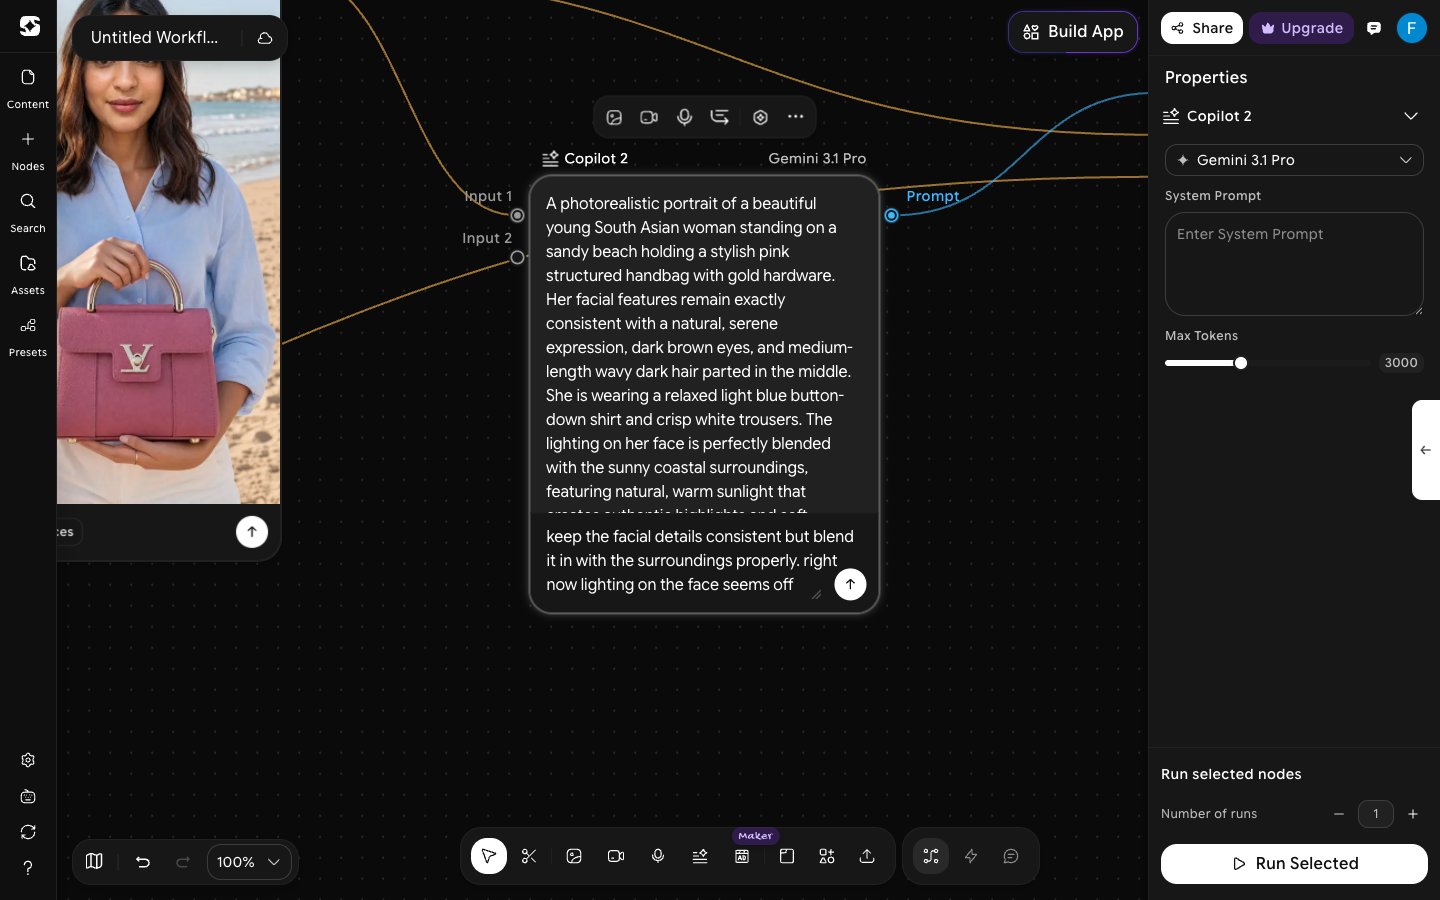 | Feature | Description |
| - | - |
| **Node Properties and Model Settings** | When a node or multiple nodes are selected, the right panel shows specific settings and the model configurations |
| **Model Selection** | Choose from available models; settings and parameters (such as aspect ratios, resolution, etc.) will dynamically adjust based on your selection |
| **Number of Runs** | Specify how many times the selected node(s) should execute |
| **Run Selected** | Execute the selected node(s) with your configured settings |
This documentation is built and hosted on [Mintlify](https://mintlify.com), a developer documentation platform.
| Feature | Description |
| - | - |
| **Node Properties and Model Settings** | When a node or multiple nodes are selected, the right panel shows specific settings and the model configurations |
| **Model Selection** | Choose from available models; settings and parameters (such as aspect ratios, resolution, etc.) will dynamically adjust based on your selection |
| **Number of Runs** | Specify how many times the selected node(s) should execute |
| **Run Selected** | Execute the selected node(s) with your configured settings |
This documentation is built and hosted on [Mintlify](https://mintlify.com), a developer documentation platform.