> ## Documentation Index
> Fetch the complete documentation index at: https://docs.imagine.art/llms.txt
> Use this file to discover all available pages before exploring further.
# Viral Remake
> Remake a viral video with your own characters, products, or clothes.
Viral Remake recreates a trending video with your own subject. You give it a reference video and images of your characters, products, or clothes, and it rebuilds the clip around them. Start from one of the ready-made presets, or bring your own reference video.
Viral Remake has two modes:
* **Motion Transfer**: Extracts the motion from the reference video and applies it to your subject.
* **Object Swap**: Keeps the reference video and swaps a person or object in it for the one in your images.
## How to remake a video
Go to [Video Studio](https://www.imagine.art/video) and select **Viral Remake** under **Choose a Mode**.
The **Presets** panel opens next to the settings. Click a preset, such as **Store Exit Dance** or **Paris Street Walk**, to load its reference video, sample image, and prompt, and switch to the mode it uses. Click **Change** to browse the presets again, or **Reset preset** to clear it.
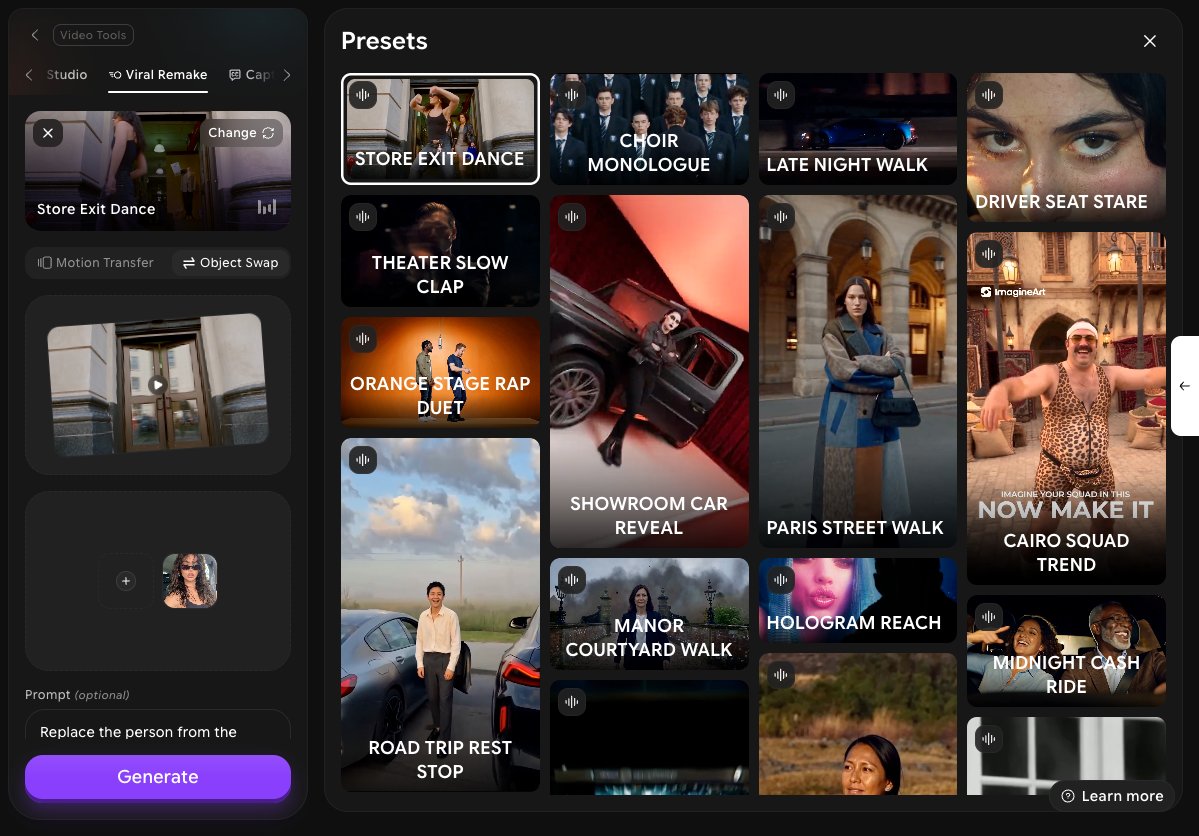 Select **Motion Transfer** or **Object Swap**.
Click the video box and upload the video you want to remake. The video must be 4–30 seconds long. If you picked a preset, click **Replace** to use your own video instead.
Click the image box under the video and add up to 30 images of the subject you want in the remake. Click **Add more** to add further images, or **Replace** and **Remove** to change them.
Under **Prompt (optional)**, describe what you want, such as "the character from @Image1 dancing on a rooftop". Type **@** to refer to the images or videos you attached.
Choose a **Quality**: **480p**, **720p**, or **1080p**. Hover over **Generate** to see the credit cost, then click **Generate**. Your video appears in **History** when it's ready.
Remakes cost several hundred credits. Always check the cost on the **Generate** button before you start.
## What to do next
Add styled captions to your remake before you post it.
Increase the resolution of your video.
This documentation is built and hosted on [Mintlify](https://mintlify.com), a developer documentation platform.
Select **Motion Transfer** or **Object Swap**.
Click the video box and upload the video you want to remake. The video must be 4–30 seconds long. If you picked a preset, click **Replace** to use your own video instead.
Click the image box under the video and add up to 30 images of the subject you want in the remake. Click **Add more** to add further images, or **Replace** and **Remove** to change them.
Under **Prompt (optional)**, describe what you want, such as "the character from @Image1 dancing on a rooftop". Type **@** to refer to the images or videos you attached.
Choose a **Quality**: **480p**, **720p**, or **1080p**. Hover over **Generate** to see the credit cost, then click **Generate**. Your video appears in **History** when it's ready.
Remakes cost several hundred credits. Always check the cost on the **Generate** button before you start.
## What to do next
Add styled captions to your remake before you post it.
Increase the resolution of your video.
This documentation is built and hosted on [Mintlify](https://mintlify.com), a developer documentation platform.