> ## Documentation Index
> Fetch the complete documentation index at: https://docs.imagine.art/llms.txt
> Use this file to discover all available pages before exploring further.
# Editorial shoots
> Generate campaign-style fashion imagery and video with a styled, editorial edge.
An Editorial shoot is for campaign imagery and video with a styled, editorial edge — the mode to reach for when mood and styling matter as much as the product itself: brand campaigns, lookbooks, and social content.
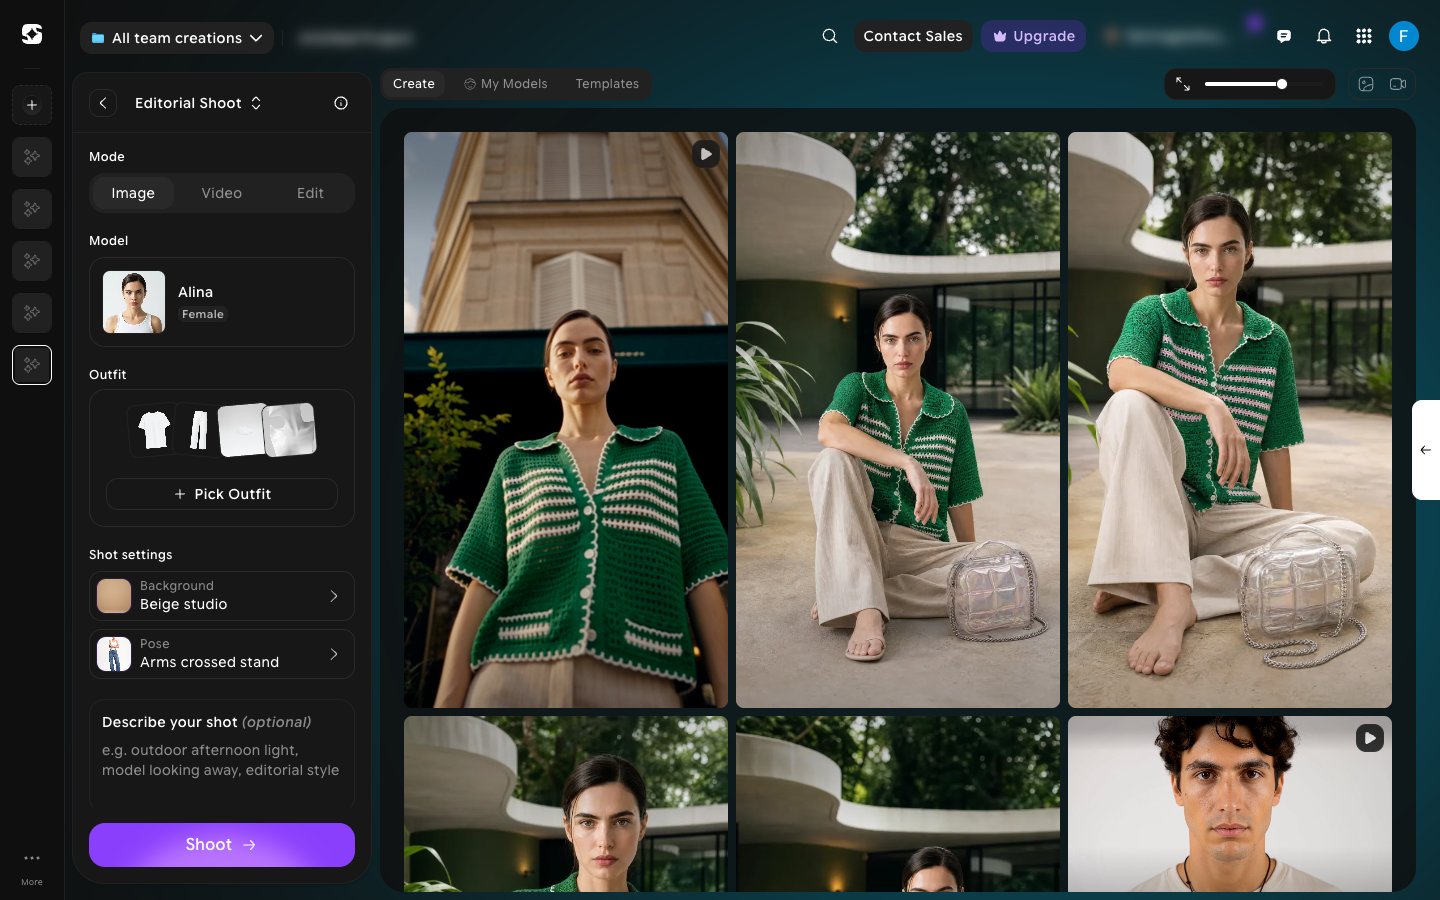
Go to [imagine.art/fashion-studio](https://imagine.art/fashion-studio) and click **Editorial image** (or **Editorial video**). This opens the Editorial Shoot editor, with the settings panel on the left and your generations on the right.
 To switch to a different shoot type without leaving the editor, click the **Editorial Shoot** title at the top of the panel and choose **Catalogue Shoot** or **Lookbook**.
Configure the shot from the left panel:
* **Mode** — choose **Image**, **[Video](/fashion-studio/video-shoot)**, or **[Edit](/fashion-studio/editing-a-creation)**.
* **[Model](/fashion-studio/models)** — pick a preset AI model, or one of your own saved models.
* **[Outfit](/fashion-studio/choosing-an-outfit)** — click **Pick Outfit** to choose the **Top**, **Bottom**, **Footwear**, and (optionally) **Accessories** in one panel.
* **[Shot settings](/fashion-studio/scenes-and-poses)** — pick a **Background** and **Pose** from the built-in libraries.
* **Describe your shot (optional)** — add your own direction, e.g. "outdoor afternoon light, model looking away, editorial style".
Set the **Number of variations** (up to 8) and the aspect ratio (**1:1**, **4:3**, **3:4**, **16:9**, **9:16**, **3:2**, **2:3**, or **21:9**), then click **Shoot** to generate.
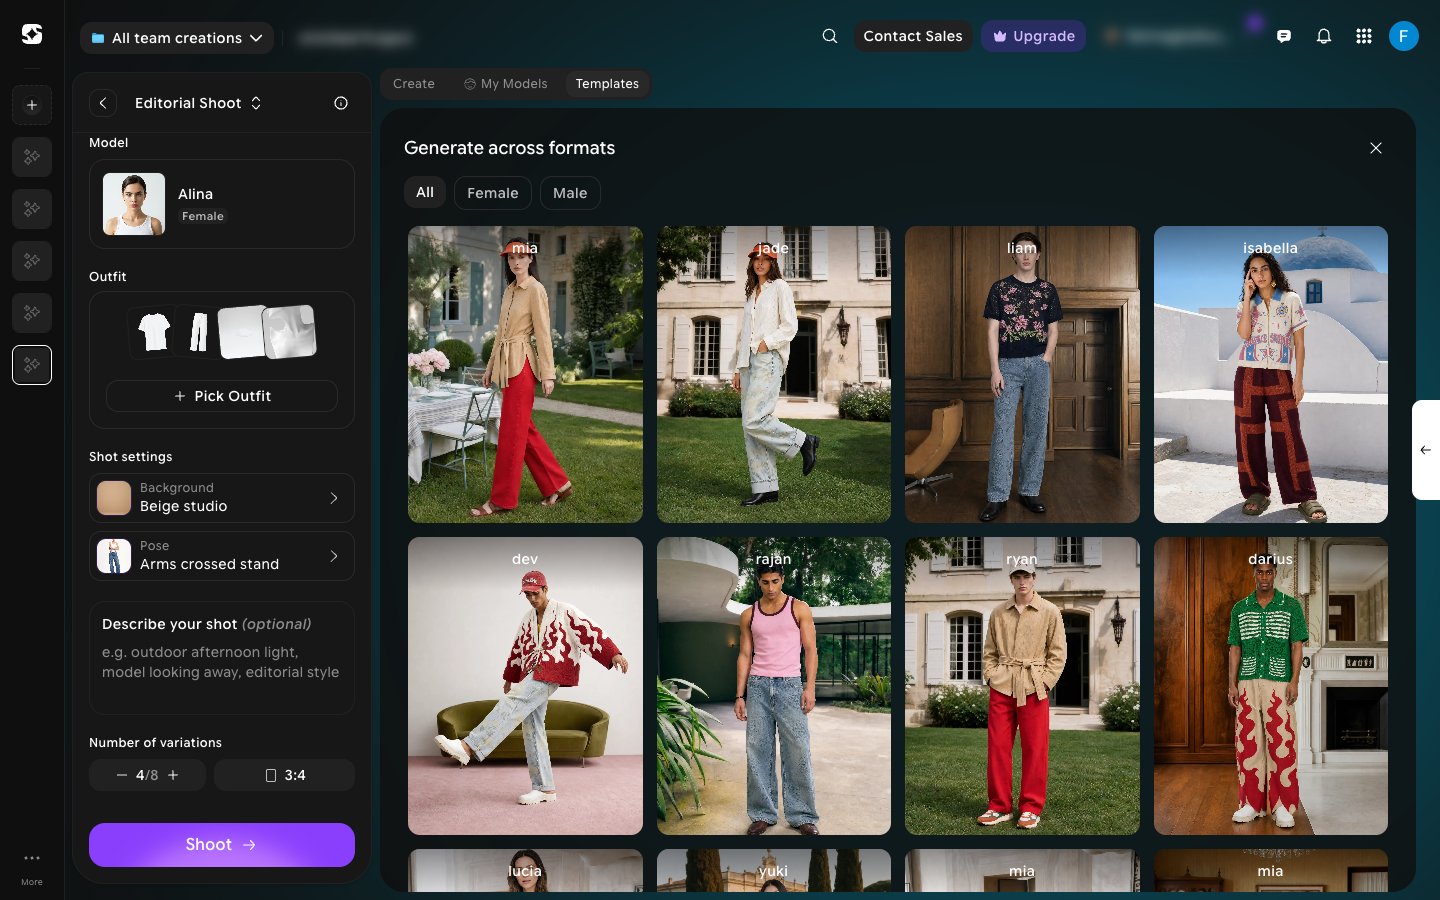
Prefer to start from an existing look? Switch to the **Templates** tab above the results to open the **Generate across formats** gallery, filterable by **All**, **Female**, or **Male**. Pick one to generate from directly instead of building a shot from scratch — see [Templates](/fashion-studio/templates) for the difference between this gallery and the one on the landing page.
To switch to a different shoot type without leaving the editor, click the **Editorial Shoot** title at the top of the panel and choose **Catalogue Shoot** or **Lookbook**.
Configure the shot from the left panel:
* **Mode** — choose **Image**, **[Video](/fashion-studio/video-shoot)**, or **[Edit](/fashion-studio/editing-a-creation)**.
* **[Model](/fashion-studio/models)** — pick a preset AI model, or one of your own saved models.
* **[Outfit](/fashion-studio/choosing-an-outfit)** — click **Pick Outfit** to choose the **Top**, **Bottom**, **Footwear**, and (optionally) **Accessories** in one panel.
* **[Shot settings](/fashion-studio/scenes-and-poses)** — pick a **Background** and **Pose** from the built-in libraries.
* **Describe your shot (optional)** — add your own direction, e.g. "outdoor afternoon light, model looking away, editorial style".
Set the **Number of variations** (up to 8) and the aspect ratio (**1:1**, **4:3**, **3:4**, **16:9**, **9:16**, **3:2**, **2:3**, or **21:9**), then click **Shoot** to generate.
Prefer to start from an existing look? Switch to the **Templates** tab above the results to open the **Generate across formats** gallery, filterable by **All**, **Female**, or **Male**. Pick one to generate from directly instead of building a shot from scratch — see [Templates](/fashion-studio/templates) for the difference between this gallery and the one on the landing page.
 Editorial and Catalog shoots share the same editor and the same model, outfit, background, and pose libraries — see [What is Fashion Studio?](/fashion-studio/what-is-fashion-studio) for how the two modes differ.
This documentation is built and hosted on [Mintlify](https://mintlify.com), a developer documentation platform.
Editorial and Catalog shoots share the same editor and the same model, outfit, background, and pose libraries — see [What is Fashion Studio?](/fashion-studio/what-is-fashion-studio) for how the two modes differ.
This documentation is built and hosted on [Mintlify](https://mintlify.com), a developer documentation platform.