> ## Documentation Index
> Fetch the complete documentation index at: https://docs.imagine.art/llms.txt
> Use this file to discover all available pages before exploring further.
# Getting Started: Your First Ad
> Follow this section once and the rest of the guide will make a lot more sense.
This section walks you through opening Ad Studio and producing your first ad. Follow it once and the rest of the guide will make a lot more sense.
## Step 1 — Open Ad Studio
Open your browser and go to **imagine.art/ad-studio**.
Sign in if you are not already logged in.
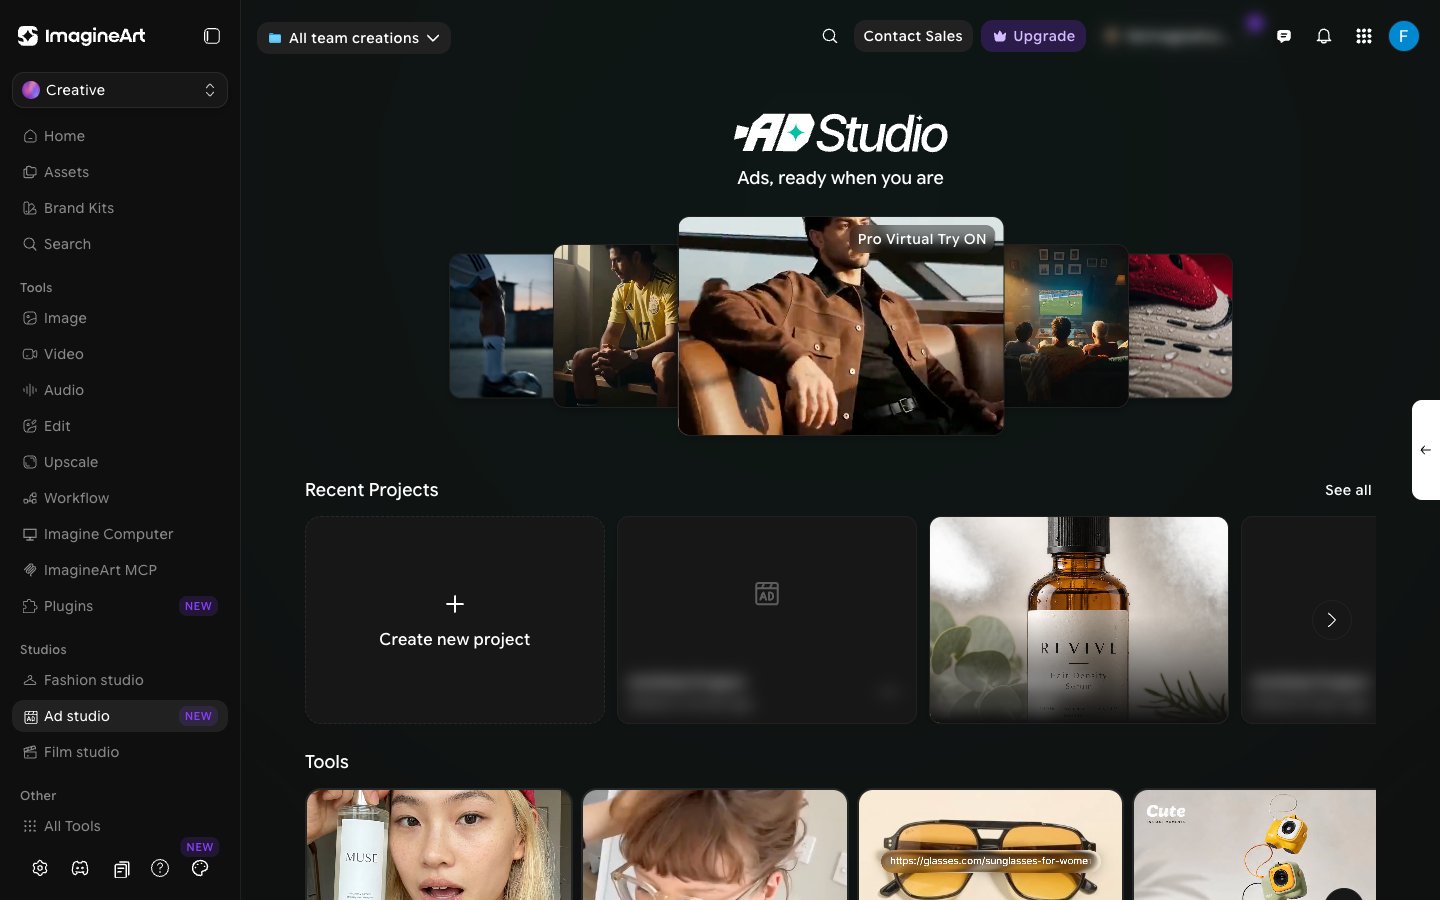
You'll land on the Ad Studio home. It has a carousel of featured ads at the top, then your **Recent Projects**, a row of **Tools**, and a **Start from preset** gallery.
 ## Step 2 — Start a new project
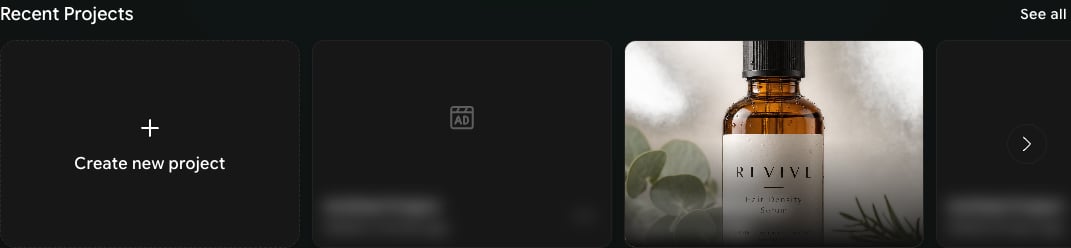
Under **Recent Projects**, click **Create new project**. A new project is created immediately — there's no separate naming step first. Click **See all** to open the full **All Projects** list, where you can search projects and sort them.
## Step 2 — Start a new project
Under **Recent Projects**, click **Create new project**. A new project is created immediately — there's no separate naming step first. Click **See all** to open the full **All Projects** list, where you can search projects and sort them.
 New projects start out as "Untitled Project." Rename it to something descriptive (for example, "Skincare Q4 Launch") once you're inside it.
Treat each campaign or product as its own project. This makes it much easier to find your variations later, especially when you're A/B testing — and you will be A/B testing.
## Step 3 — Pick your starting point
Ad Studio gives you several ways to begin. The **Tools** row on the home page has a card for each one:
New projects start out as "Untitled Project." Rename it to something descriptive (for example, "Skincare Q4 Launch") once you're inside it.
Treat each campaign or product as its own project. This makes it much easier to find your variations later, especially when you're A/B testing — and you will be A/B testing.
## Step 3 — Pick your starting point
Ad Studio gives you several ways to begin. The **Tools** row on the home page has a card for each one:
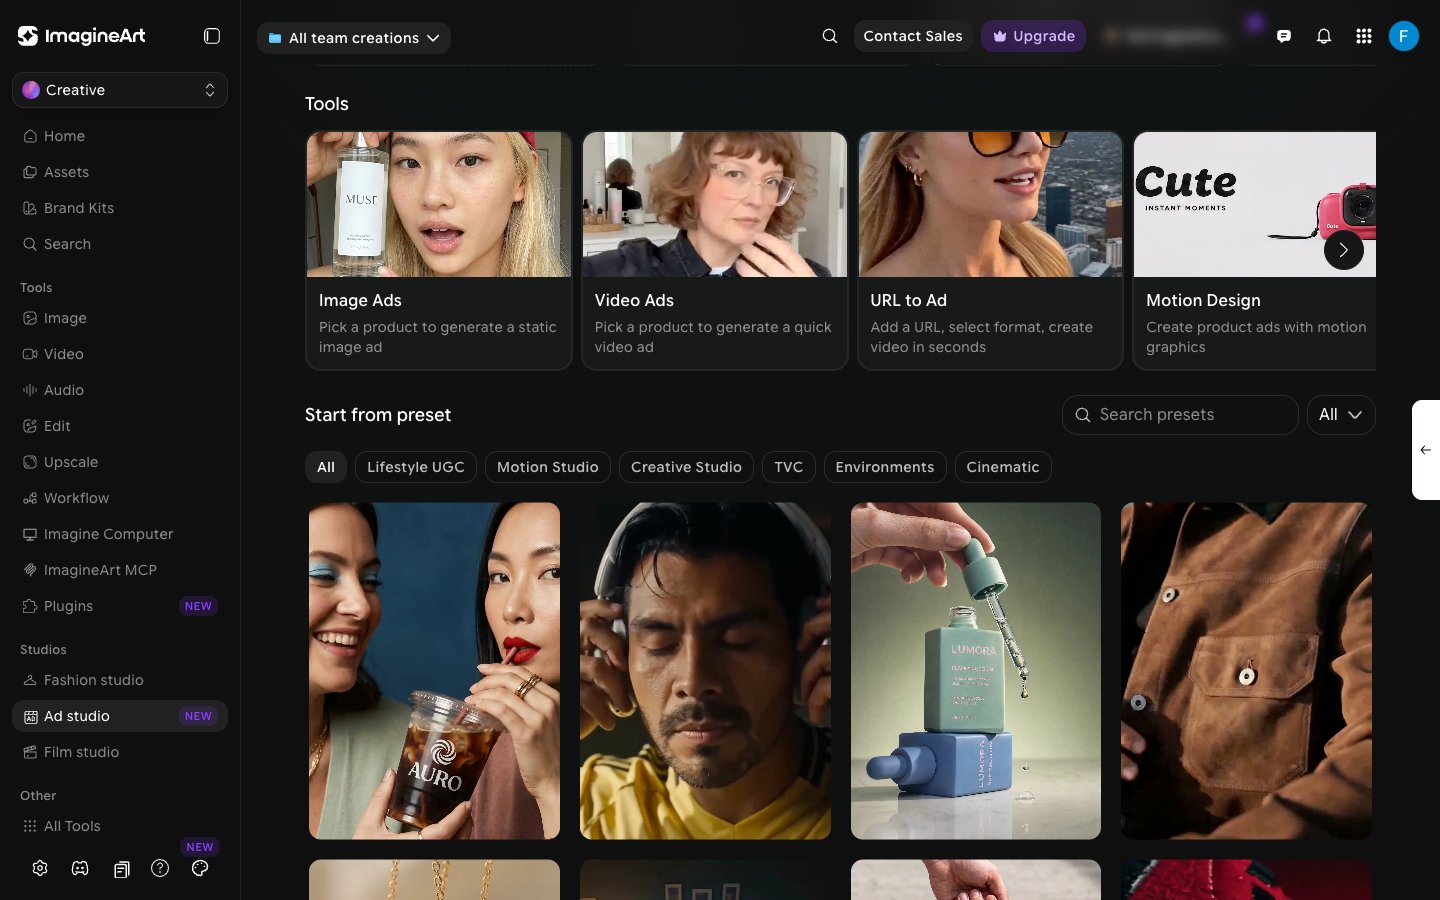 * **Image Ads** and **Video Ads.** Open a new project with the control panel already set to image or video output. Pick a product and generate. Best for: when you know which output you want and want to set it up yourself.
* **URL to Ad.** You have a live product page. Click **URL to Ad**, paste the link, pick a style, and generate. Best for: e-commerce sellers with existing product pages.
* **Motion Design.** Same product picker as URL to Ad, but generates a storyboard of independently editable scenes instead of a single clip — see [Motion Design](/ad-studio/motion-design).
* **Ad Reference.** You've seen a viral ad that's clearly working and want that energy for your own product — see [Ad Reference](/ad-studio/ad-reference). Use the arrow on the **Tools** row to scroll to it.
* **Start from preset.** Browse the preset gallery below **Tools** and click **Recreate** on a look you like.
* **Build from scratch.** You work directly in the main control panel — Template, Product, Avatar, Hook, and Background cards. Best for: full creative control, or when you don't have a product page yet.
Once you're inside a project, **URL to Ad**, **Motion Design**, and **Ad Reference** are also listed under **Tools** in the project sidebar.
If you're unsure, start with **URL to Ad**. It's the fastest way to see what Ad Studio can do with your actual product.
This documentation is built and hosted on [Mintlify](https://mintlify.com), a developer documentation platform.
* **Image Ads** and **Video Ads.** Open a new project with the control panel already set to image or video output. Pick a product and generate. Best for: when you know which output you want and want to set it up yourself.
* **URL to Ad.** You have a live product page. Click **URL to Ad**, paste the link, pick a style, and generate. Best for: e-commerce sellers with existing product pages.
* **Motion Design.** Same product picker as URL to Ad, but generates a storyboard of independently editable scenes instead of a single clip — see [Motion Design](/ad-studio/motion-design).
* **Ad Reference.** You've seen a viral ad that's clearly working and want that energy for your own product — see [Ad Reference](/ad-studio/ad-reference). Use the arrow on the **Tools** row to scroll to it.
* **Start from preset.** Browse the preset gallery below **Tools** and click **Recreate** on a look you like.
* **Build from scratch.** You work directly in the main control panel — Template, Product, Avatar, Hook, and Background cards. Best for: full creative control, or when you don't have a product page yet.
Once you're inside a project, **URL to Ad**, **Motion Design**, and **Ad Reference** are also listed under **Tools** in the project sidebar.
If you're unsure, start with **URL to Ad**. It's the fastest way to see what Ad Studio can do with your actual product.
This documentation is built and hosted on [Mintlify](https://mintlify.com), a developer documentation platform.